How to Throw A Disc Golf Roller!

Disc Golf Shot Selection Banner

This post on throwing a disc golf roller, is the next post in a series designed to help you elevate your game. Watch the videos and reinforce the concepts through reading. Watch, read, practice, and improve! 

At first glance, the disc golf roller seems like a very complicated shot.

It looks useful, but also difficult.

And there are many reasons we could want to throw a roller in disc golf. There could be low-hanging branches that limit our ability to throw into the air.

Or, maybe we like our chances of getting through the trees with our disc moving vertically instead of horizontally? 

Perhaps we need to have our disc cut a corner rather abruptly?

I’m sure most of us are familiar with seeing the pros throw these massive, distance rollers that roll for days. Maybe that’s what you want?

There are pros and cons for electing each shot, and the backhand roller is no different. 

By understanding how and when to throw the disc golf roller, you can set yourself up for success when you are on the course. 

And thankfully, as we hope you’ll see, it’s NOT as difficult as you may have thought!

As is the case with all shots, you’ll want to practice this shot so you can throw it confidently when it matters most.

Nevertheless, by the end of this post, we think you’ll have the information you need to gain that confidence.

Let’s get into how to throw a roller right off, by watching a clinic in which a young Ricky Wysocki answers a question where he explicitly addressed how to throw rollers!

Ricky Wysocki’s Advice on Rollers!

Of rollers, Wysocki starts by saying this: “It’s basically just an anhyzer that you throw into the ground on purpose.”

Let’s watch his explanation and we’ll go over the highlights afterwards, so you feel extra confident in your own disc golf rollers!

Here are the major points Wysocki covered in this video!

Pick Your Angle!

This will take practice to see which angle works best for which disc.

Before you throw, however, be sure to decide which angle you want to release the disc on, and keep the disc on that same angle from your reach back to your release.

Snap the Disc!

Just like a regular backhand throw, you are snapping the disc at the end (on the angle you brought it back on).

Create an Arc!

Because, this is “an anhyzer you throw into the ground,” the reach back and pull through follow a different path. 

Basically, you are creating an arc where the disc starts slightly below shoulder height in your reach back and then follows an upward trajectory slightly over your head and releases down.

In the next video, you will see it described as “painting the rainbow” which provides a nice visual to think about as you’re throwing.

Select Angle Based on What You Want The Disc To Do

Ask yourself What you want your disc to do after it’s released.  This will determine your angle.

Want a quick cut roller? Put the disc on a steep angle (nearly perpendicular to the ground).

Want a longer, straighter roller? You’ll want to throw your disc on more of an anhyzer and have it stand up and roll.

In general, he tells us a little later that the flippier the disc the more likely it is to cut faster. 

The more stable the disc is that you use, the more likely it is to roll longer and straighter. 

Practice!

Play around with different discs and different angles when you are practicing your backhand rollers.

In this way, you’ll see how a given disc behaves for a given throw.

Then, when it’s time to throw it when it matters, you can do so confidently!

Choose the Right Disc!

As we all know, different discs have different stabilities.

Flight ratings will give an indication, but weights, plastic types, arm speeds, wind speeds, and more will factor in as well.

In general, Ricky recommends using an understandable disc for rollers. He also recommends trying your rollers out with different discs to find what’s right for you. Check out this list for the discs most recommended for rollers by our reviewers

Once you know your discs well, you can choose the right disc for different roller situations!

Where to Land the Roller!

For a typical roller, Ricky recommends that you land the disc 60 to 80 feet in front of you.

As is the case with everything on this post, you’ll want to play around with different distances for different discs so you can find what’s right for you. 

He tells us that you want it to act like an air shot and throw it out. Then, you let the understable disc do the rest of the work and come down into the ground. 

“Focus on throwing out instead of down.”

More Disc Golf Roller Tips!

The next video features disc golf legend David Feldberg.

With over $400,000 in career earnings, he certainly knows his way around a disc golf course.

The point is, he has a lot to teach, and I’m listening.

In the beginning of his video, he gives a slightly different twist on the disc golf roller than Ricky did above. 

He gives a common misconception people have on throwing disc golf rollers.

By understanding this we can adjust our throws and throw our rollers correctly.

Let’s watch the video and go over the rest of the talking points afterwards!

A Common Misconception for Rollers!

Feldberg starts by highlighting a very common mistake he sees when some disc golfers try to throw rollers. He tells us not to do this:

Don’t throw a normal backhand and then twist your wrist down at the end!

This does cause the disc to roll.

But, Feldberg explains, it greatly caps the amount of distance and control you can get. 

Related, it’s very difficult to be consistent with. 

I don’t know about you, but I don’t want to sacrifice distance, control or consistency!

Paint The Rainbow!

Instead, he tells us to “paint the rainbow”. 

This is an idea he got from fellow legend Steve Wisecup.

Basically, like Wysocky was talking about above, you are going to reach back at the roller angle you’ve selected and make an arc (the rainbow) at least as high as your head (“maybe above if it’s a sky roller”).

When you’re “painting the rainbow,” you are flying the disc out (not straight down into the ground). 

If done correctly, it allows you to transfer more of the energy from your throw into the disc (and not lose so much into the ground).

The best rollers, he tell us, hit the ground at the “peak of the rainbow” and do not bounce. Rather, they just smoothly roll.

This is something you can look for when you are practicing for yourself. 

Adjusting The Type of Roller You Throw!

There are a few ways you can adjust what type of roller you throw. The first way to do this is by adjusting the release point.

If you want a sky roller, you will release the disc at it’s highest point in the arc

If you want more of a level roller, then you will release it later in the arc after it’s come back down more.

In both cases, he tells us, you want to continue your follow through and complete the arc of the rainbow after you release

That follow through also applies to the different swing plane you might put on a low roller.

For a low roller, it does look more like your traditional backhand throw. However, if you look closely (3:00 mark) you’ll see he is still following the arc on a  more of a horizontal plane. 

Whatever roller you throw, “ you want to have the roller [follow the arc of the] rainbow the whole way… and then you’ll have very smooth rollers. 

GG Throwing RollersDistance For Rollers!

Now we’re talking!

In general, Feldberg tells us, if we are hitting the ground 25 feet in front of us, we’re losing a lot of distance potential.

He then gives a general rule of thumb.

The farther you can get the disc to fly in the air before rolling, the farther it will go.

At the very least, we don’t want to be slamming the disc down so close to where we threw it from.

That will seriously damper our distance!

Understanding How Rollers Turn!

At 4:45 Feldberg instructs us how to know what the disc will do once it hits the ground. 

This is based on the disc’s stability. It’s just like air shots he tells us (for RHBH. Opposite for lefties). 

If it’s overstable, the disc wants to burn out to the left.

When it’s more of a neutral, straight-flying disc, the disc wants to go mostly straight on the ground.

If it’s understable, the disc wants to go right. 

It’s Not As Hard As You Think!

Lastly, Feldberg finishes with some words of encouragement on rollers.

He tells us they are easier to learn than you may think and can take strokes off our score.

It’s definitely worth it to go out and practice.

Disc Golf Roller – In Summary!

The disc golf roller, can be a stroke-saving shot out on the course.

And luckily, it’s not nearly as difficult as it looks!

It’ll take practice. But once you understand the key components, and what a given disc will do at a given angle of release, you will have far more confidence throwing the roller when it really counts.

Then, when the course calls for a roller, you won’t even hesitate.

You’ll select your disc from you bag and step into that shot with the conviction that you can execute it!

And with another shot added to your bag of tricks, it’s more strokes subtracted from your score.

And then, like your disc, you’ll be really rolling!

Comment Below!

Thanks for reading everyone! If you have more questions please feel free to ask in the comments.

We’d also like to hear if any of the tips that were provided resonated with you.

Finally, if you have a roller tip that helps you, feel free to let the group know that too!

We sincerely hope this helps you throw those disc golf rollers out on the course! For other posts on disc golf tips and advice check out the link found here!

Disc Golf Putting Tips To Help You Improve!

Disc Golf Shot Selection Banner

This post on pro tips to help you improve your disc golf putting, is the next post in a series designed to help you elevate your game. Watch the videos and reinforce the concepts through reading. Watch, read, practice, and improve!

We all know the importance of putting. We hear it from enough people high up in the sport, that it simply has to be true.

It’s also easy to understand it logically. If you throw two 250-foot throws and 1-putt, it’s the same score as a 500-foot smash and a 2-putt.

But realistically, many of us don’t have a ton of free time to get out and practice. So, when we do, we elect to practice our throws instead.

Throwing is usually more fun, so it makes perfect sense.

But you know what else is fun? Scoring well.

And scoring well is very hard to do without consistent putting.

So, it stands to reason that we will have far more enjoyment on the course, if we can confidently step up to a putt and knock it in the chains more often than not.

That is exactly what this post is designed to help you do. We’ll give you tips from top pros, so that you can practice your putting confidently and have it translate directly to the course.

Let’s begin!

Professional Disc Golfer James Proctor preparing for a big putt

General Putting Tips

Tour pro Zoe Andyke has some great general putting tips that should prove helpful to players of all skill levels. 

Her main focus, in this video, is how to properly line up your putt. 

These are some of the pointers on lining up your putt but also some general putting advice mixed in as well!

  • Keep your feet steady and solid!
  • Keep your knees bendy and springy.
  • Your hips should be squared up to the basket.
  • Keep your chest and shoulders pointing at the basket. This tip is as much about lining up your putt as it is about making sure we don’t hinge at the hip and point our chest towards the ground. Keep it pointing at the target, especially when you release your putt.

For grip, she mentions that you want to keep the disc “nice and tight” and that you can spin it a few times to find your grip. 

Another idea she gives is thinking about your putter having an eyeball on the end of it looking right at the target

After this, Zoe touches on the mental aspect (also discussed in-depth here). This is a HUGE part of making putts!

Tell yourself all sorts of encouraging thoughts and convince yourself you are going to sink that putt!

The last thing Zoe leaves us with is the focus on your legs. You get a lot more spin, speed, and power by harnessing the power of our legs. Use this knowledge, especially as your putts get farther from the basket!

Zoe has a very contagious teaching style and I absolutely encourage you to take a few moments to watch her explain these ideas herself in the video below!

Diversify Your Putting!

If you practice putting inside, then that’s fantastic. You are undoubtedly improving your game, and you should definitely keep that up!

But we all know from experience, that those ideal conditions are never quite replicated on the course. 

Often times there’s some wind or an obstacle that seems to get in the way. (Note: For some pro tips on putting in bad weather, check out a prior post called Pro Tips for Disc Golf in Bad Weather!)

If you aren’t used to it, this can really throw off your game. 

That’s why Infinite pro, Eric Oakley, tells us to go out and practice those very putts. 

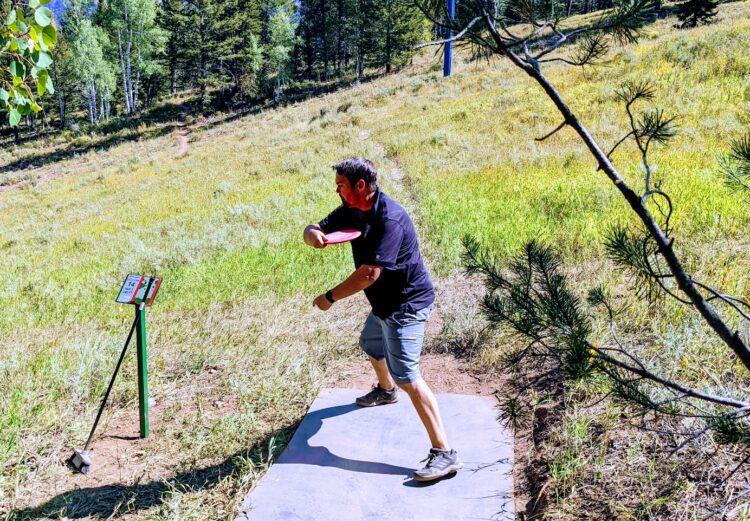
Practice with obstacles in your path, or brush in your normal swing path. 

Force yourself to step outside your comfort zone. 

You know this will happen while you’re playing. 

By practicing these shots, you are vastly increasing the odds that you complete your putt.

Oakley tells us to try going to a knee, using a pitch putt, stretching out for an angled putt, or raising your putt for a higher spin putt.

In short, try to replicate the various obstacles you might find and practice them. 

It’ll pay off.

Here’s Oakley’s explanation…

Make More Comebacker Putts!

Here’s a quick tip from Joel Freeman that will probably save you a stroke or two over time. 

Nobody hits 100% of their putts right?

So, if, invariably, you are going to miss, you might as well set yourself up for a closer comebacker. 

You do this, Joel tells us, by controlling your speed.

Make your putt travel in such a way that, should you miss, it doesn’t blow way past the basket. 

This will keep your disc golf putt totals down in the long run and pay dividends on the scorecard. 

Watch and see Joel explain it as well below…

Establish Balance!

Next up, Zoe Andyke helps us improve our disc golf putting by establishing your  foundation and checking your feet.

Zoe encourages us to take an extra moment before putting to pay attention to our feet. 

While you’re doing that, here are some questions she asks: 

Do you have proper balance?

Can you transfer your weight from backward to forward? Down to up?

In the end she reminds us to check our feet and ensure they are balanced, solid, and ready to transfer weight, before attempting to putt.

Put Yourself in Tournament Scenarios!

This tip, from Dallin Blanchard, will help you sink those pressure putts. 

Essentially, he tells us to practice as if you are in a tournament

This is an alternative to just simply slinging putts at the basket as practice. 

Every time you step up to a putt, imagine that you have to sink it.

In addition, be sure to do your pre-putting routine. This will also help simulate tournament conditions. 

At the end, watch Dallin demonstrate his routine. To add to it, you can put the putters in different spots/distances so you literally have to step up each time to the putt!

Give it a look and see what you think…

This mindset shift should help you making a lot more putts when it really counts!

Keep Your Putting Routine Consistent!

In a related tip, Eric Oakley has a video for us about routine.

No matter what the putt looks like. Whether it’s your normal putt, it’s from a knee, or anything else, you’ll want to keep that routine consistent. 

Then, around 0:45 Oakley takes us through his personal putting routine. 

See if you like any of it for your own purposes!

He likes to:

  1. Make sure he is squared up
  2. Establish a comfortable stance (he staggers with his feet closer together than most players)
  3. Come down and push up (by bending at the knees)
  4. *Hand extension towards the basket!

*Oakley considers that last part, on hand extension, to be the most important part of his routine. He got it by observing Eagle McMahon (one of the best putters on tour). 

No matter what type of putt (regular, from a knee, straddle, etc.) Oakley is focused on fully extending his hand towards the basket. 

This extension is something he believes everyone should focus on.

Watch and see how establishing a routine can help you improve your disc golf putting!

More General Putting Tips from Cole Redalen!

In this video, Cole Redalen credits his teacher who is the pro we started this post with (Zoe Andyke)!

In it, he gives his “spin” on disc golf putting and how he thinks about it every time he steps up to his lie.

Here are his major take-aways from the video.

Tip #1 on Grip – “Never put your finger on the very edge of the rim!”

Instead, put it slightly under, or some variation of under (see 0:55 to 1:40 for 3 types of putting grips he shows). This helps prevent the disc from slipping while you are putting. 

Tip #2 – Don’t Spill Your Food!

To do this you make sure that you are not hinging at the wrist and your forearm bone (The radius (The one that lines up with your thumb)) is in line with your wrist. 

Tip #3 – Cole Keeps it on Hyzer!

As he said, putting is personal, but by  keeping it on hyzer, he explains,  you rule out some of the error that can happen when you roll your wrist and send putts off line.

Tip #4 on Alignment – Pretend you have 6 eyes!

Cole credits his teacher Zoe Andyke for this tip. Imagine 2 eyes on each of your shoulders, the sides of your hips and front of your toes.

Then, make sure all of those “eyes” are pointing towards the basket. This will help you stay on line with your putts. 

Tip #5 – Come down in line with the center of your body (and the center of the basket).

Cole advises against bringing the putt off line. It introduces too many other variables. 

Swing the putter down to the center of your body and bring it back on that line towards the center of the basket.

Now, watch him explain and we’ll bring it all home afterwards!

Improve Your Disc Golf Putting – In Summary!

For lots of players, disc golf is a game we play to unwind. And what a game it is!

But for many of us, games are far more fun when you are doing well at them.

For this reason, it’s absolutely worth it to improve your disc golf putting.

This post lays out many different aspects of putting and ways you can hit putts more consistently.

It reviews:

  • Alignment
  • Grip
  • How to diversify your putting.
  • How to establish balance
  • How to find your putting routine
  • How to practice like it’s a tournament
  • How to make more comebacker putts
  • And more!

Take the time to go out and practice some of the points reviewed, and then come back and try a few more.

And while you are here, be sure to comment below!

Which tips did you find most useful?

Which ones do you plan to incorporate into your practice routine?

Are there any tips that you like when you are putting that were not covered?

Put this, or any questions you have in the comments. Together we’ll improve our disc golf putting and watch the strokes drop from our scores on the course!

Thank you for reading and keep after it on the putting greens!


Improve Your Disc Golf Mental Game!

Disc Golf Shot Selection Banner

This post on pro tips to help you improve your disc golf mental game, is the seventh post in a series designed to help you elevate your game. Watch the videos and reinforce the concepts through reading. Watch, read, practice, and improve!

We all know it’s important.

It’s a story as old as time in sports.

Those with the strongest mental games, find their way to the top.

That isn’t always true for the most talented players. In fact, many a talented player has “not lived up to their potential” because they couldn’t get over the mental hurdles.

Conversely, names like Michael Jordan, Serena Williams, Tom Brady, Mia Hamm, and so many more have made it to the peak of the athletic mountaintop in large part because of their mental fortitude.

Drive, passion, confidence, fortitude, and belief are all just words. But when an athlete exemplifies them, they are powerful words indeed!

Applying a strong mental game to disc golf is just as important.

When you stare down that windy 25-footer to stay in the hunt, you need a strong mental game.

When you eye a tight fairway on the 18th hole to preserve your one-stroke lead after your opponent just laced it up the middle, you need to have that belief that you too will execute the shot and bring home the W.

So if we know the mental game is so important, it stands to reason that it’s worth working on our mental game as well.

Today, we look at some videos that will help you do just that.

Hopefully, by the end, you’ll have some strategies to apply to your mental game that you can work on while practicing so they carry over to your competitions as well.

Let’s get to it!

Take a Moment and Breathe…

In this quick video, Zoe Andyke reminds us the importance of pausing to take a breath. Not only can this calm you down and loosen you up before your shot, but it can also help you channel your mental energy where it belongs. 

“An extra breath or two is going to help you with your focus, and collect all your energy to make the shot happen. If you can visualize it, take a breath, believe in it, and achieve it.”

Watch Zoe deliver the message and add it to your routine!

Disc Golf Mental Game – Visualize

In a related video, we have Eric Oakley stressing the value of visualization in order to achieve success on the course. 

It can come into play quite a bit for successful players before they execute shots. 

How many times, while watching the pros, have you seen them get in the tee box, walk up to the front, stick their disc out at their intended angle, and back up for the real shot? 

What so many of them are doing in that moment, is visualizing their successful shots. 

And when you visualize that success, your body is much more inclined to do the motions that will help you realize that visualization. 

This trick can be used when you are playing well, or, to pull you out of a rut when the disc isn’t flying your way. 

Take a moment to visualize a successful shot.

Then, go out and complete it!

Putt (and Play) Confidently…

This video also came up in the post on disc golf in bad weather, but it’s absolutely worth reviewing! In essence, Connor gives us a tip on how to putt confidently. 

If we step back, and expand that out to the rest of our game, we can also think about playing confidently,. 

When we are confident we are far more likely to succeed. 

So, similar to Connor finding what gives him confidence on the putting green (see video), we too should find that which gives us confidence in as many aspects of our games that we can find.

Then, we can play confidently and reap the rewards out on the course! 

Keep the Stress Low!

And on a lighter note, if we putt confidently, but they don’t quite find the chains, here is an insightful video on how to ensure we don’t get overly stressed out over missed putts! 

Enjoy!

Disc Golf Mental Game: In Summary

Your disc golf mental game is absolutely something you can work on.

The work you put in will pay dividends on the course.

By having confidence, visualizing successful shots, practicing, and taking a moment to breathe, you can calm the nerves and execute the shots when it counts the most.

So, while you are out there practicing your putting, approaches, drives, rollers, or any other aspect of your game, be sure to work on your mental game as well.

It may be the most important thing you do!

Thank you for reading everyone. If you have any tips or tricks that you like to use for your mental game, be sure to share them in the comments.

That way we can all learn from one another and up our mental games collectively!

I look forward to seeing what you come up with!

Pro Tips to Improve Your Disc Golf Forehand!

Disc Golf Shot Selection Banner

This post on pro tips to help you improve your disc golf forehand, is the fifth post in a series designed to help you elevate your game. Watch the videos and reinforce the concepts through reading. Watch, read, practice, and improve!

What if I asked you, “Would you give just over 8 minutes of your time to significantly improve your disc golf forehand?”

Would you do it?

Can I answer for you?

Of course you would!

And that’s exactly what we are talking about today. 

Nate Sexton, one of the best forehand players to ever play, gives a clinic on how he throws his forehand. 

Well, if he is throwing it that way, then perhaps we should as well. 

And if we’re being honest with ourselves, it is going to take more than 8 minutes, right?

We should pause, process, practice, replay, and repeat. A lot. 

But while we’re being honest, isn’t it completely, 100% worth it? 

I think so.

The alternative might be sending an errant forehand way off line to smack a tree and go careening off into the netherlands of the woods.

Or, watching yet another forehand “turn and burn” and cut roll embarrassingly close to the location you just launched it from?

Or executing any of the countless other issues that occur when we throw forehands?

Yes, this is definitely worth the investment of time.

Sexton has us covered, soup to nuts, from grip, to reach-back, to follow through, with countless other nuggets to mine (that’s what I’m here for) throughout. 

So let’s get going shall we?

Let’s take the time to watch one of the very best in the world teach us his craft, so that we can reap the rewards with consistent, effective, and, perhaps, deadly forehands, that will drop scores from our game and make us far more complete disc golfers!

This time, in this post, and unlike the previous posts in this series on accuracy, upshots, grip, and playing disc golf in bad weather, we’re going to watch first and review afterwards.

Let me know in the comments if you like it better this way or the other.

Key Sidearm (Forehand) Pointers!

Now that you’ve watched, let’s go over some of the key points starting with warming up!!

Always Warm Up Before Throwing Big Forehands!

One important thing that he mentioned in the middle is the importance of warming up before throwing big forehands!

You can do this by gradually increasing distances or playing catch (also from short distances). 

In general, Sexton mentions, the forehand can be more taxing on your arm/body so warming your arm up is of the utmost importance!

You don’t want to injure it and be unable to use these newer techniques we’re learning today, so warm up!

Now let’s look at Sexton’s thoughts on the forehand grip!

Find A Sidearm Grip That Works For You!

The video starts right out by getting into the grip that Sexton uses.

He mentions, however, that while the disc he’s using (The Firebird) is the same size/dimensions as your Firebird, his hand is NOT the same size/dimensions as theirs (or yours or mine!).

All that means is: Just because he’s using that grip (and is one of the best in the world) it DOESN’T mean it’s the perfect grip for you (probably worth a try though!).

In the end, Sexton leaves us with 2 keys for forehand grip.

Sexton Forehand Grip Key #1Have 2 fingers be on the rim.

Sexton Forehand Grip Key #2Leave NO Space between the disc and your hand (at the base of your thumb and pointer finger. (This provides more consistency and less wobble.)).

Once you do that, it’s up to you to find a method that’s comfortable for you.

Comfort above all else,” Sexton reminds us.

Then, at about the 1:30 mark, Sexton moves to footwork.

Power forehand throw on the all star courseUse Proper Footwork To Maximize Your Forehand!

Nate begins by telling us, with a cheeky grin, that he uses “The World Famous Sexton Hop” for his footwork. 

Here’s the “Sexton Hop” Sequence for RHFH (opposite for LHFH):

  1. Left Foot Step
  2. Right Foot Step
  3. Right Foot Hop
  4. Go (Step forward with Left Foot and Throw)

For anyone that plays baseball, he likens this footwork to what an outfielder does in baseball when throwing it back into the infield. 

In baseball, this would be called the “crow hop.”

The basic premise is that you, in his words, “turn your hips sideways to your target, temporarily, while you load the shot, and then you’ve got to snap your hips out of it, and then come through back to square to get big power.

He goes on to point out that others use different footwork before moving on to the ever-important forehand reach back. 

Use Proper Forehand Reach-Back!

Sexton starts out the section on reach-back (at 2:45) by discussing the wrist action and contrasting it to the backhand. 

The backhand is thrown with a passive wrist. A locked wrist. The forehand is an active wrist throw.”

Another contrast he points out is the reach back. 

In the backhand you typically do a long, straight reach back.

Not so with the forehand. 

The forehand reach back is NOT linear,” he tells us. 

The elbow is far from the body in the reach back with your elbow bent and the face of the disc looking at the back of your head (at about head height).

At 3:20 he addresses when you should be tucking your elbow into the body.

When you get into “the hit of the throw” pin the elbow to the side of your body (when throwing hyzer or flat) for as long as you can. But not for the reach back or follow through. 

When I want to get into the hit of the throw, I am going to pin the elbow to the side…Bring it in close, snap the hips, snap the wrist forward through, and then on the follow through again, obviously the elbow is coming off…

Then, at about 3:55, Sexton gets right into controlling angle on the forehand shots.

How to Control Angles with the Forehand Throw!

To work on controlling angles, Sexton points out 3 levers you can use to do so with the forehand shot. Wrist, elbow and hip. 

He then translates for us and tells us how he uses these levers for hyzer and anhyzer shots. 

For the wrist, he shows us how the wrist lever can set the disc on a hyzer (with the wrist pointing downward), flat, or anhyzer (wrist flexed up).

With the elbow, we see that you can use it to throw hyzer (disc swings below elbow) or anhyzer (elbow off the body and disc above the elbow joint).

And finally, he points out you can drop the inside hip to add more hyzer to your shot as well (You probably don’t want to do the opposite for the forehand anhyzer he shows).

Understanding these three levers, and practicing them a lot, will help you master your angle controls on any given forehand shot. 

At this point, he is asked a question about warming up to prevent pain (which we covered partly at the beginning when we talked about warming up slowly and gradually.)

But he also made sure to stress the importance of using the snap of the wrist so you are not cranking your arm and so you can “work smarter not harder.”

Next, at about the 5:25 mark, we get into disc selection for learning proper forehand technique.

Choosing the Right Disc for Forehand Shots

One key to making good throws, is selecting the best discs for forehand throws.

Sexton is a big proponent for learning to throw forehand by using understable discs because it “let’s you control angles.”

He continues.

You gotta be able to work some angles with the flippy stuff, and you’ll be thankful for it when you get on a really tight woods course, or you have a tailwind, and you need to generate power across some different, more subtle lines, that aren’t just a wide open field hyzer.”

Preventing the “Turn and Burn” Forehand

At the end of the video, Sexton is asked if he has “any last tips for beginner sidearm?”

The first thing that comes to mind for him is wrist snap.

Just to reiterate, the wrist speed is so important.

Then, he goes onto a point regarding the wrist action that he didn’t necessarily touch upon earlier.

The main thing that people do wrong is roll the wrist [too early] through as if they were throwing a football… [with the] fingers pointing down in the follow through…”

“With a forehand hyzer…you need to keep the palm up for as long as possible…very late in the follow through, sure, your hand will roll over…”

Essentially though, Sexton tells us to keep that wrist up until that disc is a good ways out of our hands. 

This will ensure we’re not turning over to quickly and “turning and burning” those wobbly forehands.

His final bit of wisdom in this video is a healthy dose of logic. 

The forehand you really need to learn,” he tells us, “is the hyzer because then you have consistent right moving, right skipping shots (for RHFH), and that’s what’s going to save you 3 strokes a round next month…”

Deep Forehand Reachback
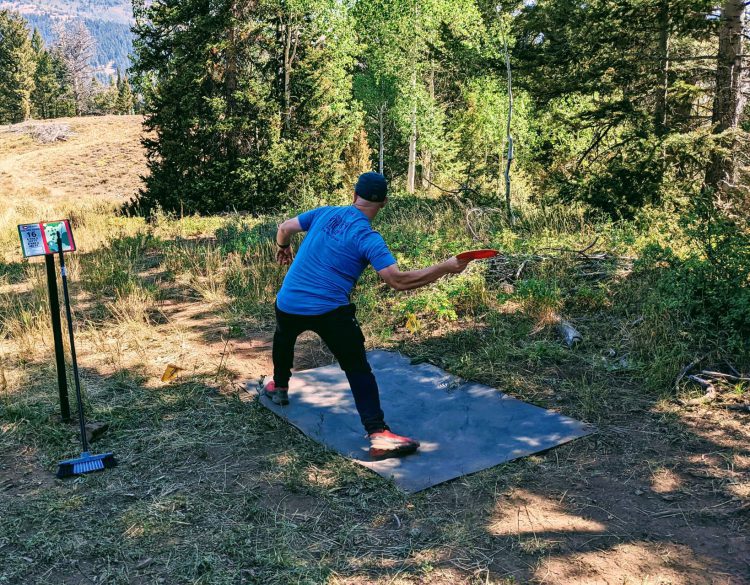
Forehand Tips from Ricky Wysocki

Now we go from one legend to another. 

In the next video we see a young Ricky Wysocki (circa 2017).

In the video below, Ricky takes questions during a clinic and in it, he pretty much reaffirms so much of what we just went over in Nate Sexton’s video.

Ricky goes over the proper reach back that Sexton talked about.

He also talks about the grip (and leaving no space between the disc and the hand).

There’s the importance of the wrist snap (vs. “arming the disc”) for power and less wobble. 

He also discusses why we turn our forehands over (unknowingly rolling wrist or arm over before releasing the wrist).

Wysocki then talks about lining up his shot by lining up his feet.

Weight Shift While Throwing Forehands

At about 6:35, a gentleman mentions that his timing gets way out of sync if he does anything more than one step. He then proceeds to ask Wysocki about his run up for forehand.

It’s here that Ricky waxes a little about the importance of weight shift in forehand (but also backhand and sports in general). 

I recommend watching it, as it really hammers home the importance of timing as it pertains to this weight shift.

You really just want to keep your weight back (on your back foot) until your arm’s coming through

In a related question, another person asks him about whether or not we should be twisting at the hips. 

In essence, he tells us “no.”

If we are twisting at the hips we’re introducing so many new angles/directions that the disc could fly off on. 

Instead, he instructs, think of it more of a lateral, side to side, movement of the hips. 

Have the hips shifting towards the intended line you want to throw on.

Improve Forehand Through Trial and Error Practice

One final message that Ricky imparts throughout the video is the importance of trying these things out in order to improve your disc golf forehand. This applies for both distance throws and approach shots

He tells us what we already know, but it bears repeating. 

We’re going to get better at these techniques by trial and error, and by practicing and adjusting. 

Before long, he tells us, it’ll become second nature.

Give the video a look and have Sexton’s points reaffirmed and learn a few new ideas as well!

Improve Your Disc Golf Forehand – In Summary

There you have it! Those are some tips from some of the very best in the game on how to improve your disc golf forehand and get more distance.

To start, we watched Nate Sexton give a clinic of sorts on his best tips for the forehand.

Here’s what he gave us:

  1. Always warm up!
  2. Grip – Have two fingers on the rim and leave no space between the disc and your hand. In the end, find what’s comfortable for you!
  3. Footwork – Try the Sexton Hop!
  4. Reach Back –  Remember that it’s non-linear and comes up behind your head (see video).
  5.  Elbow Tuck – For the hit of the throw, tuck your elbow into your side for throwing hyzer or flat.
  6.  Angle Control – Use your wrist, elbow and hip to control angles.
  7.  Wrist – Remember that forehand has an active wrist snap (instead of “arming” the disc).
  8.  Palm Up – Keep your palm up until after you release (this will help you prevent “turn and burn”)
  9.  Understable Practice – Practice forehands with flippy, understable discs. This will help you control your angles better.

Sexton gave us a lot and it’s all quite valuable. Wysocki, who’s not too shabby with his forehand himself, reinforced a lot of Sexton’s advice and added a few tidbits of his own.

Here’s what Wysocki had to say:

  1. Weight shift – Shift your weight from your back foot to your front foot as you are coming through.
  2. Hips – Instead of rotating the hips and introducing new angles to your throw think of your hip movement as a lateral, side to side movement towards your intended line.
  3. Practice – Go out and try your shots and learn through trial and error!

As I said before, there is certainly a lot to take in. But as we also said, it’s absolutely worth the time investment to be learning from some of the best in the world.

Comment Below!

I hope those tips from Sexton and Wysocki have helped you improve your disc golf forehand.

They certainly have for me!

Let us know in the comments below if there were any tips that resonated with you.

Were there any that were new to you?

Do you have any tips that you use that wasn’t mentioned in the videos?

Did you prefer this format (watch first, review second)? Or do you like it the other way around?

Anything you still want to know about?

Let us know all this and more!

In the meantime, keep working on your game everyone and reap the rewards on the course!


Pro Tips for Disc Golf in Bad Weather!

Forehand Tips

This post on pro tips for disc golf in bad weather, is the fourth post in a series designed to help you elevate your game. Read the tips clearly laid out for you in writing. Then, reinforce them by watching videos created by professional disc golfers. Read, watch, practice, and improve!

Most of us have played in that incredibly difficult weather. 

Maybe the wind is gusting, or it’s too cold to feel your hands? 

Maybe it’s both? 

And while we’re at it, let’s add some cold rain in there as well.

All of these elements can distract you from your game, and seriously disrupt your rhythm out on the course. 

In addition, they can prevent you from going out to practice and work on your game in the offseason.

But there are some things that the pros do to combat some of the elements so they can keep their scores low and keep working on their games in the offseason.  

Knowing these will greatly help you out on the course when the conditions are less than perfect. 

Let’s take a look at some helpful tips for disc golf in bad weather, and start dropping your scores as the temperature drops as well!DG Approach shot in the snow

Tips For Practicing In Bad Weather!

The first video we have is playful in nature, but has some simple, helpful tips you can use to combat the weather. 

Infinite sponsored pro Erika Stinchomb joins Connor to give us some insight for how she prepares for an upcoming season in the snow and harsher conditions. 

Tip #1 – Dress appropriately and wear layers!

It sounds obvious, but if you are unprepared for the conditions, you are far more likely to be distracted by cold appendages or general discomfort.

This mental energy pulls you away from your game and can negatively impact your scores.

So, she explains, dress appropriately, with layers.

That way you can easily adjust (add or lose layers) as the weather shifts.

Tip #2 – Bring a friend!

Again, as you watch, you’ll see that this one is light-hearted in nature, but helpful as well!

By bringing a friend you have an extra set of eyes to help you track your disc flight and find it if it gets buried in snow.

Tip #3 – Throw standstills in the winter when the footing is shaky!

This tip is dual-purpose. 

The first purpose is safety.

Throwing standstills makes it far less likely that you will slip in tough conditions.

Not only can this hurt you, but it can hurt your game, as your disc can go way off course if you slip as you throw.

The second purpose of this is practice, and it leads nicely into tip number 4…

Tip #4 – Focus on one part of your game at a time!

Erika tells us, “You should never be working on multiple aspects of your game [at the same time] like your grip, and where your arm is, and what your back leg is doing.”

“Pick one, get comfortable. Then pick a new thing.”

In the bad weather, she explains, you can just slow down and focus on one part of your game.

That way you are actually improving in the offseason and you’ll reap the rewards later. 

There’s a fifth tip too, but I’ll let you discover that one for yourself! Enjoy!

More Words of Winter Wisdom!

Next up we have Alex Tews who has the perfect name for his Tuesday (Tewsday) Tips. Alex will be explaining some other tips for you to combat that snowy, cold weather.  

In this video, the first two are similar to Erika Stinchcomb’s tip on dressing appropriately and wearing layers, but with some additional specific ideas about how to go about it.

Tip #1 – Make sure your layers are not too restrictive.

A lot of people equate cold weather with wearing the biggest, bulkiest jackets and apparel they can get their hands on.

In disc golf, however, this can seriously hamper your throwing motion and take you off your game.

Instead, he explains, wear lots of thinner layers as well as hats and neck warmers when necessary.

Tip #2 – Wear Gloves or Mittens!

Here comes an obvious statement: In disc golf we use our hands.

And if our hands get cold the blood pulls away and makes them feel numb.

This is terrible for throwing discs with touch and accuracy.

Instead, wear gloves and then shed the gloves right before each shot. That way your hands stay warm and you can better complete each shot! 

Tip #3 – Bring towels. Lots and lots of towels!

With snow, or rain, the towels will help you keep your disc dry so you can get a better grip for each shot. This relates to the final tip as well…

Tip #4 – Let your discs adjust to the cold weather before playing.

If you bring warm discs out of your house and throw them into the snow, that snow is going to melt all over them and make your discs all the more difficult to clear off.

Instead, let your discs sit outside for a spell (10 minutes or so) before you throw them.

This way they can adjust to the outside temperature and be far easier to brush off when they invariably hit that snow.

Tip #5 – Consider changing up your discs for outings in the snow.

It’s easier than we want to believe to lose our discs in the snow.

So don’t bring your favorite discs that you’ll be devastated to lose.

You might also want to consider using some colors that stand out better in the snow (like green).

All told, this last tip will make for a far less stressful outing in the snow!

Now you can watch and see how Alex explains each of his tips as well.

Now that we’ve got a good plan of attack for playing disc golf in bad weather, let’s look at some putting tips for those conditions, and especially the wind!

Putting in the Wind!

When the wind is gusting, those putts can be pretty daunting. 

But if you have a few strategies in place, and you go out and practice them for yourself, you can feel a lot more confident. 

In the next video a local pro from Maine, Nicole “Pickle” Dionisio, shares the tips she uses in the wind. 

Then, at the end of the video, she hits a bunch from the edge of circle 1 (with the wind clearly moving in the background) to prove to you that she knows what she’s talking about!

Here are some tips she has for us…

Wind Putting Tip #1 – When you prep for your putt, use the grass to gauge wind direction.

This is a classic ball-golfer’s trick.

Pinch some grass from the ground, loft it into the air, and see which way it goes.

This will give you great intel on wind direction as well as wind strength.

Then, you can adjust your putt accordingly.

Tip #2 – In a headwind, get lower to the ground and keep your disc as flat as you can.

This allows you to really push it through the wind without the wind taking your disc for a wild ride!

Tip #3 – In a tailwind, put the nose of your putt up higher than usual.

Pickle likes to leave the putter nose up and let it ride up to a higher spot on the chains.

This counteracts the tailwinds tendency to knock your disc way down. 

Now watch and see for yourself so you can crystalize these important tips!

It will definitely benefit you to try these tips out in the wind so you can gain the confidence for when it matters out on the course.

Now, here’s one final putting tip for you!

A Final Putting Tip for Bad Weather!

Okay, let’s look at one more tip for those days when the weather is less than ideal. 

In this video, Connor shares a tip that has helped him for all his putting, but especially when the weather is tough.

It sounds obvious, but it’s also a good reminder for us all. 

It gives him confidence which translates to lower scores as well…

Connor’s Putting Tip for Bad Weather – Use your legs!

He explains that when his putting is not going well he’s “all arm.”

By pushing off your back leg towards the basket, he explains, not only do you get more distance, but also more confidence. 

This translates to better scores!

Give it a watch and see how Connor uses his humor to give a valuable tip at the same time!

Disc Golf in Bad Weather Review 

There were a lot of tips packed into this post on disc golf in bad weather!

Below, I’ll summarize them and combine some that are similar so it’s not too much coming your way…

Tip #1 – Dress appropriately/wear many, less bulky layers.

Tip #2 – Throw standstills when the footing is shaky.

Tip #3 – (Related to #2) Only work on one part of your game at a time!

Tip #4 – Let your discs adjust to the cold so snow doesn’t melt on them.

Tip #5 – Consider changing your bag and bringing less “valuable” discs for outings in the snow.

Now here’s a review on a few putting tips that will help you in those windy/inclement conditions.

Wind Putting Tip #1 – Use the grass to help you gauge wind speed and direction.

Wind Putting Tip #2 – Keep the disc more nose up for putting in a tailwind.

Wind Putting Tip #3 – Keep the disc flat AND crouch lower when putting into a headwind.

Finally, let’s not forget Connor’s general putting tip that especially helps in bad weather.

Connor’s General Putting Tip – Use your legs and push towards the basket!

Wrapping Up! Comment Below!

There you have it folks!

We hope these pro tips for disc golf in bad weather can add up for you and help you practice effectively in the offseason, as well as drop some strokes from your scores. 

As always, don’t hesitate to let us know in the comments if you have any tips you consider when playing in tough weather. 

The offseason is never as long as it feels, and getting out to practice will pay huge dividends when the season starts up again.

And if you are looking for more tips to improve your game, be sure to check out these posts filled with helpful tips on accuracy, grip, and approach shots.

Keep at it and reap the rewards later!


Disc Golf Grip Tips

Forehand Tips

This post on disc golf grip, is the third post in a series designed to help you elevate your game. Read the tips clearly laid out for you in writing then reinforce them by watching videos created by professional disc golfers. Read, watch, practice, and improve!

Okay everyone, go ahead and grab a disc… 

As a matter of fact, while you’re there, you might as well get a disc from each category (putter, midrange, fairway driver, and distance driver) so we can test out some different grips on each.

This is one of the few disc golf activities you can do in your home without fear of broken lamps and the like…

We might as well take advantage, right?

In today’s post, we are going to look at some specifics on how to properly grip your disc in order to improve performance and stay consistent out on the course. 

These videos will NOT get into all the minutiae that can be found on the intricacies of each grip. Rather, they will collectively give a good overview, as well as provide some concepts that you may not have considered yet. 

Also, this post will mainly focus on backhand throwing grips. If you are interested in looking at the forehand grip, you’ll be able to find it in this video on forehand approach shots. 

As a matter of fact, this post ties in nicely to some of the other posts in this series on accuracy and approach shots. If you haven’t already, be sure to give those a look as well.

For now, disc in hand, let’s get right into some of the particulars of how some of the best players in the game grip a disc.

That way, you can feel confident and secure in your own grips and know that you are taking yet another step to put yourself in position to succeed on the course!

Disc golfer deciding between a power and fan grip

Power Grip versus Fan Grip!

In the first video, we are not only going to take a look at how Infinite-sponsored pro, Eric Oakley, grips a disc for his backhand throws, but we are also going to consider why he alternates grips in a given situation out on the course. 

As you watch him alternate between the power grip and the fan grip, I highly recommend you pause the video and try to emulate his grips on the discs. 

The video does a good job of showing you close-ups so you can make sure you are getting the grips (fan and power) Oakley recommends for backhands. 

But the real take-away, in my humble opinion, comes a bit later on with the following tip…

Grip Tip # 1 – You can diversify your shot selection by changing your grips and keeping the same line!

In other words, you can throw the exact same line on a shot, but get a different result (mostly in the ground play) by switching between power grip and fan grip.

As you watch the video, notice how Oakley keeps the flight path of his two shots similar. Then, watch how he gets distinctly different ground play when the discs hit the ground.

For a fan grip, you can expect less ground play. This can be helpful when you are trying to stop the disc where it lands.

For a power grip, you can expect more ground play, or skipping. This helps when you are asking the disc to go around obstacles and continue traveling towards the target after it hits the ground. 

Now, have a look and see for yourself!

Oakley’s last line sums it up well: “if one really needs the ground play, I’m probably throwing a power grip. If one doesn’t, and you want it to sit soft, [I’m] throwing that fan grip.”

In this way, he tells us, we can add diversity to our bags and keep dropping scores out on the course!

Shot Consistency with Grips!

Next up, we have some tips on how to keep your shots consistent.

We do this by keeping your disc golf grips consistent as well.

Our teacher is the one and only Paul Ulibarri.

The video we’ll watch is an entire clinic, but the part on grips comes at the very beginning.

Early on, Ulibarri drops a helpful nugget on keeping your shots consistent…

Grip Tip #2 – For consistency in your throws, place the disc in the crease, or fold, of your hand.

If you press your pinky and thumb together, this “fold” of your hand will reveal itself in your palm. (But you will definitely see it when Ulibarri discuss it at the 1:20 mark).

By putting the disc in that crease each time, he explains, he is virtually guaranteeing himself the same grip for each shot. He also assures himself of that highly coveted consistency for each shot as well. 

The added benefit of placing the disc in this crease, he continues, is that it will also greatly help you with your angle control. 

We’ll get into angle control in a future post. But if you ever wondered what the pros do in their pre-shot routines (when they hold the disc in front of them at an angle), then definitely continue watching…

That should help  add some more consistency to our game with our disc golf grip.

Now, let’s look at how we can use grip to add a little distance.

Grip Tip for Distance!

Last but not least, we’ve got Connor giving us a post for throwing far.

“Finally!” you say! “Bout time!”

And Connor, when talking physics, is going to be the first to admit that he’s got a few of the terms mixed up. When he says “kinetic energy” he means “potential energy”.

And when he says “grip energy” I’m pretty sure he means “grip pressure.”

But don’t let that take away from his key point.

Grip Tip for Distance – For distance throws, put 95% of your grip pressure between your pointer finger and your thumb.

By putting the pressure at the front of your grip, you are allowing the disc to pop, or spring, out of your hand. This gives it more speed, spin and thus, distance. 

He also tells us, with regards to pressure, “You gotta grip that sucker!”

By putting the pressure at the front of your grip you are preventing the disc from coming out too early, and losing a lot of it’s speed/spin.

An important distinction, as I see it, is being able to grip your disc with pressure WITHOUT tensing up your arm. 

When you can do that, you can have the fluidity we want in our arm. We can also keep the disc secure so it can burst forth and propel out of your hand. 

This takes practice, but is well worth the work you put in. 

Give his video a watch and let it crystallize…

Disc Golf Grip Tips – In Summary

There’s a lot of different information out there on grips.

In this post, we tried to give you some disc golf grip tips that would help you stay consistent on the course. They also present some ideas that you may not have considered.

3 Crucial Grip Tips:

  • Disc Golf Grip Tip #1 – You can diversify your shot selection and determine how much ground play you want, by alternating between power grips and fan grips.
  • Disc Golf Grip Tip #2 – For consistency in your shots, place the disc in the crease, or fold, of your hand.
  • Distance Grip Tip (#3) – For distance throws, put MOST of the pressure between your pointer finger and your thumb.

There you have it! Those are three helpful tips on grip! We certainly hope they aid you in your progress!

But maybe you have some disc golf grip tips as well? If so, don’t hesitate to leave them in the comments below. Which grips do you use in different situations? Do you have any tricks to help you keep your grips consistent? Let us know this, or anything else in the comments!


Disc Golf Tips on Approach Shots

Forehand Tips

This post on disc golf approach shots, is the second post in a series designed to help you elevate your game. Read the tips clearly laid out for you in writing then reinforce them by watching videos created by professional disc golfers. Read, watch, practice, and improve!

Approach shots are an undeniably important part of any successful disc golfer’s game.

Often times, however, they get overlooked in favor of more “intriguing” elements of the game.

The last post in this series gave great tips from pros on accuracy. Check it out here if you haven’t already.

Accuracy, combined with these tips on approaches can blend nicely to make a potent cocktail out on the course.

By shoring up your approaches you can consistently put yourself in position to putt once and start walking to the next hole. 

Let’s get right into it, with some excellent advice on approach shots straight from the game’s experts!

Our first tip on disc golf approach shots, has to do with a mental strategy that can greatly reduce the holes where you put up a high number. Let’s look!

Approach Tip #1 – Aim to land your disc in a 25 foot radius circle (instead of always aiming to park it).


Kesler Martin succinctly explains the very important logic to this tip. 

Basically, players that always try to park their disc will often be forced to take much more difficult/riskier lines to the basket. 

By expanding to a 25 foot radius (or more) you greatly open up your options on various flight paths and dramatically increase the likelihood you’ll take a more sensible line to the basket/landing zone.  

This leads to far fewer scrambles and far less strokes added on the course!

Give it a look for yourself below and see if you agree!

After you have this vastly expanded landing zone for your disc golf approach shots, here’s a tip to help you lock in those back hand approaches even more…

Approach Tip #2 – Keep your eye on the target while you throw (especially with backhands).

This tip, provided by Joel Freeman, applies mostly for backhand shots. 

For forehands, he explains, you should already be looking at the target so it’s somewhat of a moot point. 

Also, because the term “approach shot” can be somewhat broad in nature, this tip applies more to the shorter approaches (Joel tells us to do whatever is most comfortable for you). 

For his own backhand approaches, Joel makes it a point of emphasis to be looking at the basket (or target). This helps him hone in much more effectively. 

Have a look at the video below, and then try it for yourself!

Now let’s look at some tips for disc golf approach shots that is more tailored to the forehand…

Forehand Approach Shots

Now that we’ve discussed some strategies for the backhand approach shots, or upshots, let’s shift gears to the forehand approach shot.

Having a forehand approach shot in your bag of tricks can be critical to expanding your options for lines to the basket. 

Our next series of tips from Dallin Blanchard, will help you to lock in your forehand approach shots so you can feel more confident out on the course. 

Dallin starts out the video by stressing how he appreciates that, with a forehand upshot, you are facing the basket and that you use minimal motion (not a lot of moving parts) to complete the shot. 

The motion is straight back and straight forward. Then he gets to his first tip…

Forehand Approach ShotForehand Approach Shot Tip #1 –  Use your typical forehand “stack” grip for forehand approach shots.

Dallin goes on to explain that he usually holds his disc a little more loosely for approaches, but he is sure to keep his grip the same. 

This is just one less thing to think about on the course, and quite helpful to know!

His tips come fast and furious in this short video. After discussing forehand grip, he gets right into alignment for the next tip.

Forehand approach shot Tip #2 – Keep your shoulders, body, and feet lined up parallel to the line you want your shot to follow.

For a RHFH, he explains, you will usually want to make sure this line is aiming to the left of the basket (so the disc can naturally fade right towards the basket at the end of its flight).

This brings us to our third and final tip in this 2-minute video. 

Forehand Approach Shot Tip #3 – Keep your palm and forearm pointed towards the sky throughout the entire shot.

By doing so, you are eliminating the possibility that your wrist will roll over and send the disc flying way off-line at an unwanted angle. 

This is a very common problem for players attempting forehand approach shots. By keeping your palm and forearm pointing to the sky throughout the shot, you take this undesirable wrist-roll out of the equation. 

Now, have a look for yourself so you can start incorporating these tips into your forehand game!

Now that we’ve gotten a look at some excellent tips for backhand and forehand disc golf approach shots, let’s take a look at upshots from a very common distance on the course, and see if we can’t dial it in to save some serious strokes!

The 100-Foot Approach Shot

Now you are in for a treat! 

Follow me into the time machine as we go back many years to Infinite’s first video in collaboration with the one and only Paul Ulibarri!

In the video below, Paul runs a clinic on 100 foot approach shots. 

At the start of the video, when he’s addressing the group, he says this: “I think it’s probably the most important part of the game; getting up and down from 100 feet.”

That’s a strong take from a strong player. Probably a good thing you’re here reading and watching then!

In the footage, he will focus on backhand approach shots, but it’s not too much of a stretch to keep the forehand approach shots in mind as well. 

He’ll also briefly mention 150’ and 200’ approaches as well, so be sure to work those into your practice routine too!

Most of his instruction is at the beginning of the video, but he’ll throw in nuggets throughout so it’s worth a full watch. At 1:17, Ulibarri gets right into his first tip.

Ulibarri Approach Tip #1 – Get into an athletic position. 

For this one, it’s less about what he says and more about what he does. What he says is that he squares his shoulder towards the target.

What he does is spread his legs a little wider than his shoulders with his knees slightly bent and his weight on his forefeet. 

As you watch, look how he bounces subtly to accentuate that athleticism and engage his leg muscles. 

This is the athletic position you want to be in for your upshots (and any other shot really). 

Quickly afterwards, he moves on to his second tip…

Ulibarri Approach Tip #2 – Keep Your Eye on the Target.

We’ve heard that tip before from Joel Freeman earlier in this post!

Nice to know that other top pros are doing the same thing. Must be a good tip that we should probably all incorporate!

This tip, from Ulibarri’s perspective, seems to be from that 100’ range. He goes on to explain “from this distance, you don’t want to be turning away from [the target] and then coming back.”

That would just introduce more variables and extraneous movements. 

Moving on, we quickly get a different bit of advice we haven’t heard yet. 

Ulibarri Approach Tip #3 – Get The Nose Up on your Disc!

Ulibarri explains, “Getting the nose up means that I’m going to have touch going into the basket…”

He says that coming in nose up makes it far less likely that you’ll be soaring the disc way past the target for a far more difficult up and down. 

And for those of us that like to make a run at the basket from this distance, if you do so nose up, you can potentially have your cake and eat it too! 

By running the basket nose up, even if you miss you can help ensure the disc is landing softly past the basket without leaving yourself a lengthy putt. 

Later, at 9:07, he confirms that this nose up shot is specific to the closer approach shots (about 150’ and in). 

“When you move out,” he explains, “and you start feeling uncomfortable with that nose up, stop doing it.”  He re-emphasizes, however, that he “really highly suggest[s] it,” for those closer approaches.

So, how do you keep your nose up on an approach you ask? Paul’s got you covered!

Ulibarri Nose Up Approach Tip – Keep Your Wrist Above Your Elbow!

“What that does is it forces you to get the nose up,” he explains. 

With your wrist above your elbow, he demonstrates, it’s impossible to throw the disc without getting the nose up. 

Now, with these tips, Ulibarri tells us we are ready to throw the shot. He reviews his previous tips (athletic position, eye on the target, and disc nose up) before adding one more into the mix!

Ulibarri Approach Tip #4 – Be Sure to Follow Through!

“Now in order to throw any shot [the] most important thing is follow through…” he tells us.

Later in the video, at 5:45, Paul comes across a player that isn’t following through yet. 

“When there’s no follow through, it’s all arm,” he informs us. He goes on to elaborate that this can put undue strain on the arm, which can eventually lead to injury. 

“Your whole left side of your body needs to come over the top of your right,” he explains as he physically demonstrates it to this player. 

Always follow through,” he tells us. Whether it’s a 10-foot putt or a 500-foot drive, we should always be following through on our shots.

Short Approach ShotA Few More Thoughts Before You Watch!

For a good portion of the video (starting at the 3-minute mark) Ulibarri puts it on the players and has take practice approach shots.  

“Now I want you guys to do it,” he says. 

As each player in the clinic steps up to try out their shot, a few points jump out to me in the viewing. Look for them yourself as you watch, because I think it will be helpful.

The first thing that jumps out to me is the alignment. In tip #1 Ulibarri mentions lining up parallel to the target. 

But, as each player steps up to take the shot, Paul is consistently adjusting many of their shoulders to better align them.  

That tells me that the players think they are aligned, but may not actually be. 

This is best demonstrated with the 4th player to shoot (the gentleman in the purple shirt at the 3:50 mark). This player will take 3 shots. In the first two, watch the alignment of his shoulders and where the shot goes. 

Then, on the third shot, Ulibarri physically adjusts his shoulders, and the shot goes right on target! 

Bringing it to our own games, if your shot is going off the line that you were aiming for, it’s probably worthwhile to take a moment and film yourself to see if you have an alignment issue like this player did. 

We’ll come across other points of emphasis while watching the players throw (like the importance of follow through) but at the 5-minute mark, Ulibarri drops another nugget for us.

Ulibarri Approach Tip #5 – Before any event (or round), Play Catch!

“If you play catch from 100 feet and in before every round, those strokes are going to disappear,” he explains.

“Cuz it’s practice, and it’s fun practice. How often do you get to play disc golf and you get it thrown back to you?” he speculates. “Right?” he finishes.

As usual, you’re very right indeed Paul! 

Finally, at the 7:45 mark, one player asks Ulibarri about grip and he weighs in with his last tip…

Ulibarri Approach Tip on Grip – Do What Works for You!

He explains that he was told many times that fan grip is best for approaches

But then he watched McBeth win multiple World Titles in a row using a power grip approach.

Shortly after, he decided to switch back to the power grip himself for his approaches, because that is what he preferred all along.

 Rather than force the fan grip, because he was told it’s better, he went with what he felt most confident with (hence his tip). 

He notes that a lot of his fellow pros use power grip for the approach, while others use the fan grip.

What it boils down to, he opines, is picking a grip that you feel comfortable, confident and consistent with. 

“Put it in your hand, [and] the way your hand naturally goes around the disc,” he says, “that’s your natural throw, and I say stick with that.”

Now, let’s synthesize all Ulibarri’s advice by watching him run his clinic below. Afterwards, be sure to practice these tips and apply them to your own games!

Disc Golf Approach Shots – In Summary

That was certainly a lot of information!

Approach shots are so important, however, that we feel it’s absolutely worth it.

Here’s a quick run-down on the tips we covered in this post regarding approach shots.

  • Tip #1 – Aim to land your disc in a 25 foot radius circle (instead of always aiming to park it).
  • Tip #2 – Keep your eye on the target while you throw (especially with backhands).
  • Tip #3 –  For Forehands, use your typical forehand “stack” grip for approach shots.
  • Tip #4 – Keep your shoulders, body and feet lined up parallel to the line you want your forehand shot to follow.
  • Tip #3 for Forehands – Keep your palm and forearm pointed towards the sky throughout the entire shot.

Go out and practice those and see how they feel! Then come back and look at some of Paul Ulibarri’s tips on the 100-foot approach shot.

Here those are as well…

  • Tip #1 – Get into an athletic position.
  • Tip #2 – Keep your eye on the target.
  • Tip #3 – Get the nose up on your disc by keeping your wrist above your elbow.
  • Tip #4 – Be Sure to follow through!
  • Tip #5 – Before any event (or round), play catch!
  • Tip on Grip – Do what works for you!

There you have it folks! Those are some great tips on approach shots from some of the top experts in the game!

We hope that you find them to be useful, and that they take some serious strokes off your scores.

Be sure to let us know your thoughts in the comments.

Which tips did you find most useful? Which tips do you plan to use right away? 

Are there other tips you find helpful for disc golf approach shots?

Tell us about it all in the comments below!


Disc Golf Tips on Accuracy

Forehand Tips

This post on accuracy in disc golf, is the first post in a series designed to optimize your opportunities to absorb and learn the content that will elevate your game. This series will have tips clearly laid out for you in writing which will then be reinforced with videos by professional disc golfers. Read, watch, practice, and improve! Let’s begin!

If you are reading this post, I applaud you. You are serious about taking your game to the next level! 

We all love the distance (and don’t worry, we got you there too!). 

But the last time I checked, the object of the game was to get the disc into the basket in the fewest strokes possible. 

And how much good is that 475 foot bomb going to do, if you smack a tree 50 feet in front of you and send it careening off into the bowels of the woods? Not so much help there… 

Same thing if you throw that 475’ shot out of bounds, or 150 feet off line. That’s no good either.

Throwing Disc Golf Discs AccuratelyNo, if you’re serious about low scores, then throwing your discs accurately is what’s going to get you there. Then, once we’ve got a firm handle on accuracy, we’ll add that distance in. Then, you’ll be a true force to be reckoned with!

So let’s get going and start getting you that pinpoint accuracy to drop your scores. 

This post will give you videos AND lay out the written highlights for you to review. That way you can be sure you’re downloading these lessons into your brain and carrying them with you onto the course… Let’s get started!

In our first video on accuracy, we meet one of disc golf’s rising stars in Cole Redalen.

Cole starts us off by highlighting the importance of accuracy to scoring those birdies. (Like I said, you’re in the right place!).

As you’ll see in the video he is working on a straight shot in a direct line with the basket. For this shot he is using a neutral putter. This brings him to his first tip for accuracy.

Accuracy Tip #1 – Make your walk-up be in a straight line with the direction of your release.

For a straight shot, you want to be moving your body along that  straight line to the target. That means your walk up, and X-step are all along that same straight line.

If you are throwing a hyzer line, you’ll be going diagonal from the back left of the tee box to the front right (for RHBH). And the opposite is true for an analyzer line (Back right of teebox to front left for RHBH).

But really, it all boils down to one thing: Make your walk-up be in a straight line with the direction of your release! 

Cole does a good job of demonstrating this tip before getting to his second tip on accurate shots.

Accuracy Tip #2 – On your reach back and follow through, keep your disc in a straight line with the basket.

After Cole shows you two examples of his pure form, throwing the disc straight and true, he goes on to emphasize this second tip on accuracy. He also gives a helpful visual on what not to do (note: this is a prime visual example of that dreaded term we call “rounding”) and shows how problematic it can be for accurate shots. 

Logically, it makes sense. If you want your disc to follow a straight line to the basket, you should keep it on that very same straight line the whole time. 

Otherwise, If you pull it back behind you and off that line, it is going to be far more difficult to release at the precise time that will get it heading towards your intended target.

Now that you’ve read up on these two tips, have a look at Cole’s explanations and let it crystallize in your mind!

Those two tips should help tremendously. But there’s more information to be had!

In our next video, there is a very important tip that is closely related to the previous two tips.

It has to do with foot placement so you can ensure that you won’t round and will be able to keep that disc on a straight line as you pull through towards the basket. 

In this video Eric Oakley talks about 3 things that all pros are doing on tour. The first “thing” leads us to our third accuracy tip.

Accuracy Tip #3 – Do NOT keep your feet parallel to the line to the basket.

As you watch the video (this tip starts at the 4:30 mark) it all makes sense. If your feet are in a parallel line with the basket, then when you reach back, your body will be in the way of that straight line you want to pull through on (tip #2). This leads you to twist and contort during your shot and seriously hampers the likelihood you’ll keep that disc on your intended line.

Instead, Oakley explains, put your front foot forward. This allows you to create space for your disc to go back and follow through on that line to the target. 

Watch the whole video, because it’s helpful (and funny!), but if you want get right to the spot where tip #3 resides, start watching at the 4:30 mark.

We’ve got one more tip for you on disc golf accuracy, but I don’t want you to worry about holding it all in! We’ll be sure to review all the highlights at the end of the post for you as well… For now let’s check out this last tip for you to take with you!

Another video that is going to help you with your accuracy (and distance) helps stress the importance of your follow-through. 

In this video, Infinite Discs sponsored pro, Eric Oakley, really stresses the importance of follow-through for effective backhand driving accuracy (and distance).

At the start of the video, Oakley gives a nod to pro legend JohnE McCray, whose very deliberate follow through helps demonstrate its importance to accuracy and distance. This brings us to our next tip.

Accuracy Tip #4 – Keep your follow-through continuing forward on the same line as your pull-through.

When you are practicing this tip, play around with really exaggerating the straight-line follow through. In this way you can find the amount that works best for you in your new and improved form. 

Some of you may be wondering: How does this help with power as well as accuracy?

As it turns out, this tip has multiple benefits because it adds power to your form as well. 

Eric Oakley explains how by saying, “it really takes all of my momentum and puts it into the disc…”

Now, watch Eric Oakley for yourself and see how keeping that follow-through in line with your pull-through will keep those shots accurate, with an added boost of power as well!

Disc Golf Accuracy – In Summary

As we said at the start, accuracy is an oft-overlooked, but absolutely crucial part of any complete player’s disc golf game. With so many obstacles on the course, how could it not be?

And while most players are looking to add that coveted power, you’re here and looking to drop your scores. Well played.

Thinking about it further, this is a far more logical sequence to follow. Once you have the accuracy, then you can focus on adding distance. The reverse just leads to bad form and more headaches.

So, let’s quickly review our tips on disc golf accuracy. Then, you can feel confident hitting those tight lines the next time you’re on the course.

Disc Golf Accuracy Tips:

  • Tip #1 – Make sure your walk up is in a straight line to the basket.
  • Tip #2 – On your reach back and follow through, keep your disc in a straight line with the basket.
  • Tip #3 – Do NOT keep your feet parallel to the line to the basket. (Instead, have your front foot staggered out in front or forward).
  • Tip #4 – Keep your Follow-Through continuing forward on the same line as your pull through.

There you have it folks! Combined with practice, those tips are sure to help you navigate past trees, through mandos and around any other obstacles that are constants in our beautiful game!

If you need a refresher on any of these tips, be sure to come back to this post and reread/re-watch the content any time!

Also, we want to know your thoughts, so be sure to comment on this post as well.

Were there any tips that you found helpful or new to you? Are there other tips you find helpful for your own disc golf accuracy? Did any of these tips result in some tighter lines for you on the course?

Be sure to let us know this and more in the comments!


1 2 3 4 5