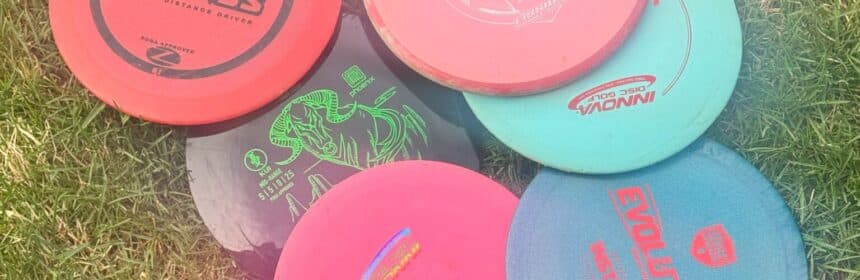
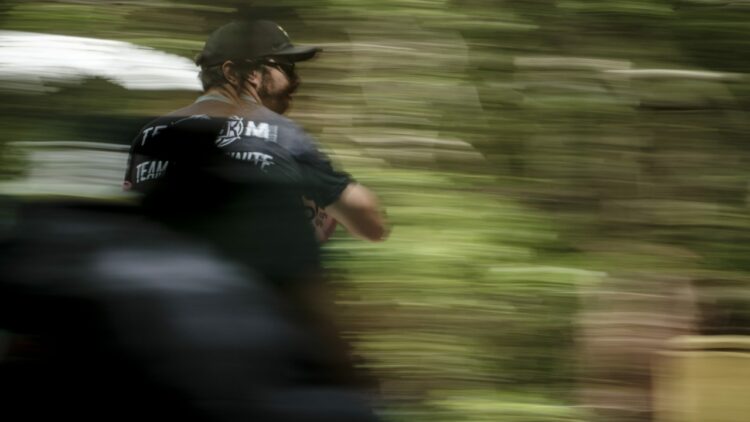
Are you looking to get better at disc golf? Here is a collection of tips we’ve learned from our sponsored professionals as well as other knowledgeable disc golfers who have something beneficial to share.
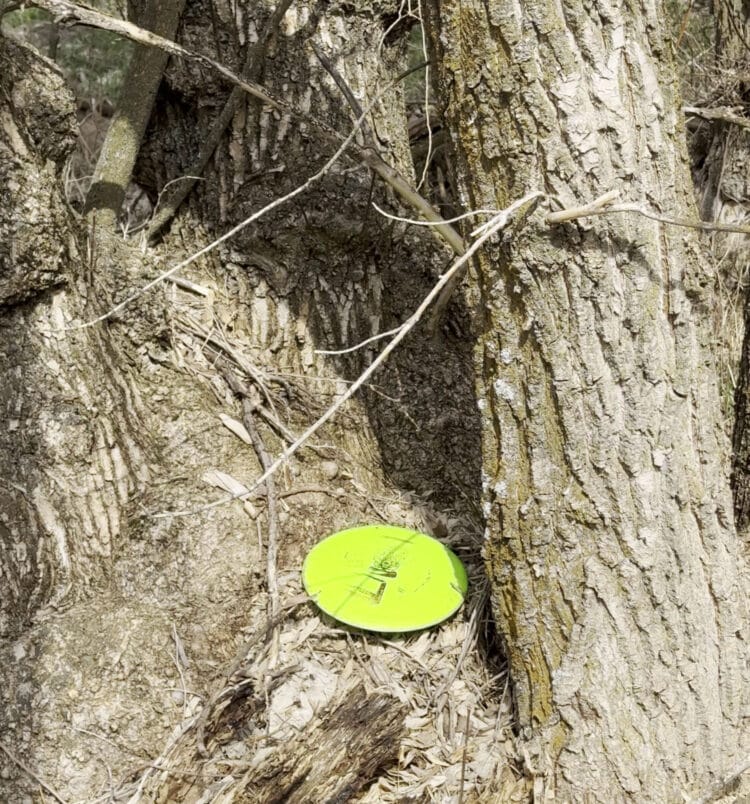
It’s spring time here in northern Utah and the snow levels on the mountains are rising with the temperatures. The warmer weather mean more opportunities for hucking discs. It also means more lost discs. Although I can’t guarantee you’ll stop losing discs in this blog, I’ll give you a couple tips to improve your odds of getting lost discs back.
Regardless of your skill level, if you play enough disc golf you will end up losing a disc (or two. Or ten) Whether the disc ends up in some bushes, a body of water, or even deep snow, many of us end up walking away from a disc on a course. What can we do to improve our chances of getting our disc back?
While there are a few disc golfers, who live by the motto, “Finders, Keepers”, there are many more who will attempt to get the disc back to its original owner. Some of those people will only make the attempt if there is contact information on the disc (as opposed to posting a picture on a local Facebook page.) That leads us to the first tip.
Write Your Contact Info on Your Discs
This simple task of writing your name or some contact information greatly improves your chances of getting your disc back if it gets lost. If you are not comfortable writing your name and/or phone number, consider using an email address. You could also get a Google Voice phone number (which is what I do) that you use exclusively for this purpose, and put that on your disc. Whatever method you use, giving people a way to contact you might make the difference between getting your disc back or not.
Check Your Penmanship
It is frustrating to me when I find a disc that has a number on it, but can’t read the digits. Is that a six, or an eight, or maybe a zero? I don’t want to text a bunch of wrong numbers in my quest to return your disc to you. If you don’t have the most legible penmanship, ask someone else to write your info on your disc. Another convenient option is to buy a rubber stamp with your info on it. Then you can quickly stamp your discs with clear information.
Refresh and Update
Even if you diligently write your contact info on your disc, it will fade over time. That phone number you wrote last year might not be visible, and lead to people having to decipher what your digits are. Take the time at the beginning of the season to check your go-to discs to see how the ink is holding up. You’ll save a disc finder from having to do detective work.
Many people change their phone number when they get a new phone. If you do, remember to update your discs with your new number. It’s a bummer for me to attempt to return a disc with a number on it, only to get the message that a number is no longer in service. Or to have someone reply that it isn’t their disc.
Bye-Bye Bag
Every year, without fail, I see a Facebook post from a disc golfer saying their entire bag got stolen out of their car. Many times, their fellow club members will offer replacement discs, which is good to see. However, avoiding the theft in the first place would be preferable.
By not storing your disc in your car, you reduce the opportunities that a thief has to take your stuff. A lot of people keep their bag in their car all the time, for convenience. If that is the case, lock it in your trunk. If it isn’t visible, it will be less of a temptation for an opportunistic bad guy. Someone could still break into a locked trunk, or even your house, but they are less likely to go to that length for a bag and some plastic.
Keep Your Discs!
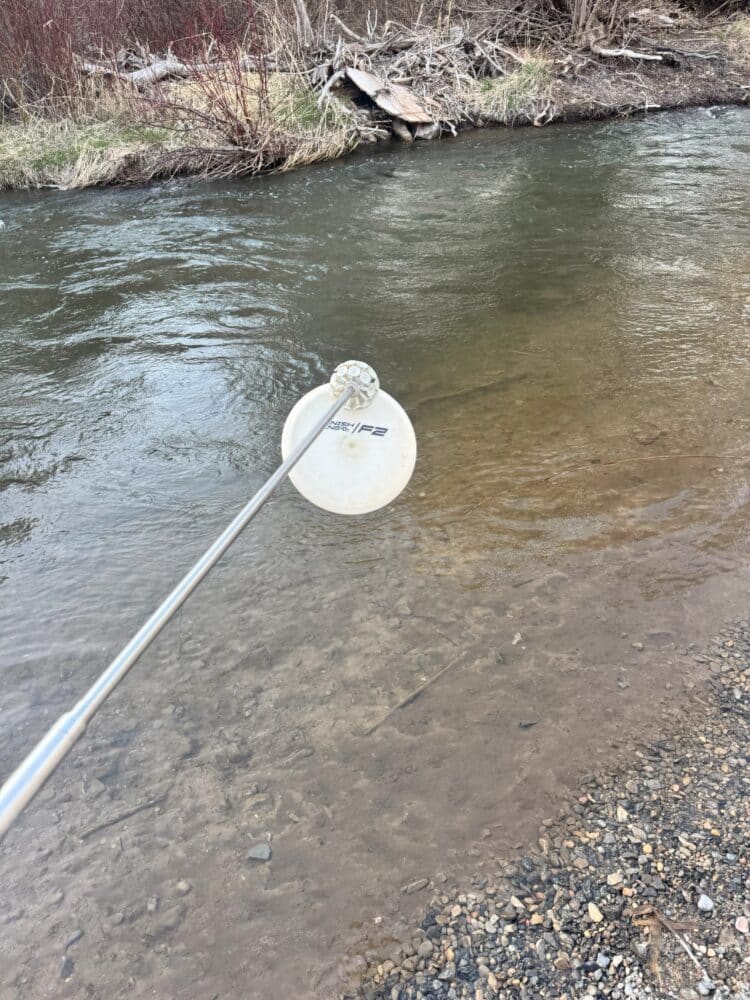
After a recent local tournament and league, I found 38 discs in or around a river that runs through the course. I was able to contact the owners of 28 of the discs from the phone numbers on the discs. Those are good stats, in my opinion. And they were made possible because people took the time to write their contact info on their discs. (Another seven got claimed after I posted a picture of the discs on our club Facebook page.) Increase the odds that YOU get your disc back by writing your contact info on your discs!
If you need to replace a lost disc, I know a good place to shop for a new one!
Laws Regarding Found Property
On a side note, I’ve seen a lot of debate about whether or not people make an effort to return discs that they find. Some people, as mentioned above, believe in ‘Finders, Keepers’. Others will make an effort to locate the owners. What are the legal ramifications of keeping a disc?
In Utah and some of the surrounding states, the law requires you to either notify or surrender the disc to law enforcement or a government entity. In the entire history of disc golf, I doubt this has ever happened. (Idaho law states that the item must be over $100 in value, which excludes most discs.) It may be a requirement to surrender a found disc, but those are laws with very little teeth.
Here’s the scene: you just arrived at your favorite course and are preparing to tee off on the first hole. You grab your favorite driver and are already looking forward to that wonderful S-shaped flight. But, after you give your disc a good, solid throw, the disc something weird. Instead of a short drift to the right followed by its usual finish to the left, it just keeps drifting off to the right. Heading toward a river, a road, an OB area, or something unfavorable. What is going on here?!
In this blog we will talk about turn vs. fade, what those terms mean, how they work, and how to use them to your advantage. This knowledge will help you make better disc selections for the variety of situations you’ll face on the course.
Turn and Fade Defined
For those disc golfer new to the sport, let’s define a few terms that we will use in this blog. These are terms you will commonly hear in disc golf. If you’ve been playing a while, you can skip over this section, since you will be familiar with these terms.
Backhand throw: A popular method of throwing a disc where you implement an ‘X-step’ to twist your hips and ‘reach back’ the disc in preparation for throwing. The back of your hand will be facing the basket as you pull your disc across your body. The disc will rip out of your hand due to force created by the leverage of your arm and body.
Forehand throw: A method of throwing a disc where you are facing the direction you are throwing and motion of your body resembles a sidearm throw in baseball. Your palm will generally be facing the basket as the disc rips out of your hand.
Turn: When throwing a disc with your right hand with a backhand throw, ‘turn’ is when the disc drifts to the right when the disc is traveling the fastest. How much turn you get on a throw depends on the speed of the throw and the flight numbers of the disc.
Fade: In a RHBH throw, as the disc slows down toward the end of the flight, ‘fade’ is the distance and amount that the disc finishes to the left as is slows down. Discs have a natural tendency to move left as they slow down, but a disc with more ‘fade’ will travel further and faster left.
Flight Numbers 101
It would be good to have a quick primer on a discs flight numbers. The sport has adopted Innova’s four-number system to indicate the flight of a particular mold. In the description we will describe the numbers as if the disc were thrown RHBH. The four numbers represent:
Speed: The relative speed that you need to throw the disc at, in order for it to fly like the rest of the numbers indicate.
Glide: A general indication of how long the disc will stay in the air.
Turn: How much the disc will veer to the right during the flight of the disc.
Fade: How hard the disc will turn to the left at the end of the flight.
How Turn vs Fade Affect Your Throws
Obviously, the design of the disc can have a great impact on its flight. Some discs are designed to have a lot of turn, while others have a lot of fade. And there are plenty of discs in between those extremes. While the design of the disc definitely affects its flight, there are many other factors that will help determine how the turn and fade are affected. Here are some examples:
Wind:
Depending on the angle of the disc, cross winds can push the disc a long way in the direction it is blowing, or it can push a disc down to the ground. Turn and fade are really affected by headwinds and tailwinds. A headwind will give a disc more turn and minimize the fade. That is likely what happened to the disc mentioned at the beginning of the blog. A tailwind will reduce the amount of turn and add to its fade. Knowing how those wind directions affect your disc can help you adjust your throw or your disc selection to compensate for the effect of the wind.
Disc Weight:
If you throw discs of different weights with the same power, the heavier discs will not fly as fast. That will give the heavier discs less turn and more fade, while the lighter discs will have more turn and less fade.
Plastic type:
Premium plastics are typically more overstable, especially plastics like Champion. That overstability reduces the turn on the disc, and adds a lot more fade. Even brand new, base plastics like DX or D-Blend will turn more than other plastics.
Disc wear:
New plastics will always be more overstable and offer less turn than plastic that have been ‘seasoned’, or broke in. A worn disc changes the effects of the rim of the disc and give the disc more turn. Sometimes discs can wear to the point that they have too much turn and are hard to handle. That might mean it’s time for a new disc.
Elevation:
Throwing uphill takes more energy and makes the disc behave as if it has more fade and less turn. Conversely, throwing downhill has the gravity assist and is easier to throw fast. That gives your disc more speed, which causes it to turn a lot more and fade less.
Choosing the Right Discs for You
Most people who are new to disc golf prefer molds that have a lot of turn.
Doomsday Apocalypse Flight Numbers: 13/1/1/6
That gives them a little more extra distance, since most don’t have the technique and arm speed to throw molds that have more fade and less turn.
Once players have more skill and arm speed, they reach for discs that can resist turn, so they can get more distance. They will be throwing discs that are: heavier, newer, more overstable plastics, have more overstable flight numbers.
Regardless of your skill level, it is nice to have molds that are a little more overstable, and a little more understable so you can compensate for those situations that affect your flight, such as wind and elevation. Do you have a tailwind for your drive? Grab your disc that is more understable so you can still get the distance you need. Downhill shot? An understable disc might give you too much turn, so that would be a good time to reach for the more overstable disc.
Practice Makes Perfect?
It is a good idea to practice on windy days so you can learn how to either adjust the angle of your disc, or choose a different disc entirely, for given situations. The same goes for throwing up or down hill. You could even practice wind and elevation changes so you would be comfortable throwing in nearly any situation you may encounter. With a little experience you will have solutions for those times you are faced with adverse or unusual throwing conditions.
Learn the Flight
Disc golf is a fun challenging sport that is actually enhanced by the variety terrain and conditions we face when we play. By knowing our discs and how they fly for us, we will find more success in our disc selections, regardless of the situation. That confidence translates to lower scores and the satisfaction of knowing turn vs fade in a disc can be used to our advantage.
Disc golf involves more than just throwing discs toward a basket. Players must familiarize themselves with rules, gameplay strategies, techniques, equipment, terminology, and even flight ratings. For beginners, understanding the variety of discs, flight numbers, and plastic options can feel overwhelming. Among these essential tools is the mini marker disc, a small but significant part of the game. Here’s everything you need to know about disc golf mini markers
What Are Mini Marker Discs Used For?
The primary role of a mini marker disc, often called a “mini,” is to indicate the position—or lie—of a thrown disc once it has landed. In disc golf, every throw changes the player’s position on the course. To continue play, the next throw must be made from the lie, which is the designated area behind where the previous disc landed.
If a player doesn’t use a mini, the lie is marked by the original disc, and the playable area is a rectangle measuring 20 cm x 30 cm directly behind it. When a mini is used, it is placed just in front of the disc (toward the basket). The disc is then removed, and the lie becomes the rectangle behind the mini. Using a mini marker effectively shifts the lie forward by about 8-9 inches, giving a slight advantage.
Are Players Required to Use a Mini Marker?
The Professional Disc Golf Association (PDGA) doesn’t require players to mark their lie with a mini in most situations. However, there are two exceptions:
Out-of-bounds discs: If a disc lands outside the boundaries, a mini must mark the new lie.
Rule-mandated adjustments: When a rule requires or allows a change in the lie’s position, the player must use a mini to mark it.
Beyond these exceptions, using a mini marker is optional. In fact, it’s possible to play an entire tournament without one. That said, mini discs are affordable, portable, and worth carrying—especially for competitive play.
Why Use a Mini Marker?
Using a mini marker has a few practical advantages:
Closer positioning: Marking your lie with a mini gives you a slightly closer position to the basket, which can be helpful in tight situations.
Consistent routine: Some players find placing a mini helps establish a rhythm before their next throw, allowing a moment to reset mentally.
Improved focus: Writing a motivational phrase or mantra on the mini can help players get into the right mindset.
Clearer visuals: A mini marker offers a smaller profile compared to a standard disc, giving players a less obstructed view of their footing.
While these benefits come down to personal preference, many players find mini markers improve their overall gameplay experience.
What Are the PDGA Rules for Mini Discs?
According to the PDGA’s technical standards, mini discs used in professional play must meet the following criteria:
Diameter: 7 to 15 cm.
Height: Less than 2 cm.
Beyond these specifications, there’s plenty of room for creativity. Mini discs can be made from a variety of materials, including plastic, wood, metal, foam, or even glass. Custom designs are also acceptable, as long as the mini complies with the size standards.
Common Questions About Mini Discs
Q: What is the purpose of a mini disc golf marker?
A: Its main function is to mark the lie, providing a clear and consistent spot from which to make the next throw.
Q: Are players required to use a mini?
A: No, except when marking out-of-bounds throws or adjusting the lie due to a rule.
Q: What are the benefits of using a mini disc?
A: Minis provide a slightly closer lie, help players maintain focus, and create a clear routine.
Q: What materials and designs are allowed for mini markers?
A: Any material is permitted, provided the mini falls within the PDGA’s size guidelines (7–15 cm in diameter and less than 2 cm in height).
Ready to Add a Mini to Your Gear?
Check out our collection of affordable, high-quality mini discs here. Whether you prefer classic designs or custom styles, you’re sure to find one that suits your game!
When I first started playing disc golf, I got to a hole on a course in northern Utah which had a sign on it that was new to me. The sign said ‘Mando’ and had an arrow pointing left of the tree it was attached to.
I looked to the left and saw a wooded fairway that was tight with lots of trees. To the right there were no obstacles. I didn’t know what the sign meant; it looked Spanish to me. So, I took aim to the right and let my disc fly… over a sidewalk and near a playground and parking lot. I’ve since learned about the ‘mando’, and although it does mean ‘command’ in Spanish, its name’s origin has a different meaning.
Mando are important to the game of disc golf. Among other things, they ensure that discs are going in a certain direction on certain holes, while protecting other people and property. In this blog we’ll learn about what mandos are, why we have them, and how they work. Let’s learn about the mando!
What is a Mando?
In the sport of disc golf, a mando is short for ‘mandatory’. In practice, that means that it is mandatory that you throw your disc on only one side of the obstacle or pole that the mando sign is attached to. If you don’t throw on that side of the mando, you get penalized.
A majority of the mandos that you see on a course are left or right mandos. That means you are required to go either left or right of a pole, tree, or whatever the arrow is attached to or rules indicate are the mando feature. If there are two arrows present, it is called a double mando. Typically, your disc has to travel between two mando arrows (or more specifically, between two objects that the arrows are attached to). There are also triple mandos, which are two side mandos and something across the top which limits the height that you can throw your disc.
In rare occasions, such as unsanctioned tournaments, you’ll see a quad mando. This is basically a rectangle shape that you have to be able to throw your disc through. I’ve only seen quad mandos at casual, funsy tournaments.
The most common indicators of a mando are arrows pointing either left or right. Sometimes they will have the word ‘mando’ on the sign, though not always. They might also be marked with a ribbon or tape to indicate the mando object. If tape or ribbon is used, there should be some indication on a tee sign or course rules which directions you need to throw in order to successfully execute the mando. A successful throw is called ‘making the mando’. An unsuccessful throw is a ‘missed mando’
Why Are Mandos Used In Disc Golf?
While mandos should be used sparingly in a course design (in my opinion), there are several reasons why a course designer might decide to include a mando on a hole. First is safety. The mando sign I referred to at the beginning of the blog was used to keep discs away from the playground, parking lot, and walking path. Keeping discs away from those areas makes the hole safer and reduces the chance of a bystander getting hit. Plus, it makes the hole more challenging and fun by forcing players to attack a wooded fairway. Which is the second reason someone might use a mando.
While the idea of throwing discs down a wide-open fairway might appeal to some people, most of us enjoy the challenge of having obstacles that we need to negotiate in order to progress down the fairway. Those obstacles make disc golf much more fun, challenging, and satisfying when successful. Course designer know this, and might add a mando or two in order to prevent people from taking an easier route.
There is one more reason designers might include a mando: course flow. A mando is often used in disc golf to direct the flow of play. It guides players along a specific path and preventing errant throws from interfering with, or landing in, other areas of the course. Some courses have areas like a swamp, thick bushes, or other natural or man-made features. These may be challenging, but would cause delays with disc retrieval from unintended areas. Mandos can help create a more enjoyable and efficient experience for everyone on the course.
Mando Rules and Penalties
Now that you know a little about what mandos are and when they are used, let’s look at the PDGA rules that govern mandos and how to play them. The section in the official rules is not very long, and worth a read if you want to brush up on the current requirements. They complete rules are found HERE. I’ll summarize the rules in this blog, but if you plan to play in a sanctioned tournament you should look up the official rules to make sure you understand and follow them.
PDGA 804.01 Mandatory Routes
1. A mando restricts the path that a disc may take in order to legally progress down the fairway toward the basket.
2. At the mando, there is an imaginary vertical plane that that borders one or more objects that are indicated by the mando or mandos. (see image)
3. If a disc crosses that imaginary plane, whether in the air or on the ground, either forward or backward (if a roller crosses on the correct side of the mando, but curls around and crosses the plane), it is considered a missed mando and the player receives a one-stroke penalty. The lie for the next shot depends on whether or not there is a drop zone on the hole.
If there is a drop zone, the player may proceed to the drop zone with the penalty throw (for example, if they missed the mando on their first throw, they get the stroke for the throw, plus the penalty stroke, so their throw from the drop zone will be their third stroke). The player also has the option, as always, of abandoning the throw and re-throwing from their last lie. In the previous example, they would then be throwing their third throw from the previous lie, which would be the tee pad. The rules of the mando would still be in play.
4. If a players disc lands just short of the imaginary plane, but hasn’t crossed yet, the player may must still pass the mando on the correct side to avoid a penalty. It is not legal to lean through and release the disc beyond the plane, since the back of their mini is on the other side of the plane.
Mando Strategy
It is often times best to avoid a penalty by not aiming anywhere near the mando. Other times it might be strategic to lay up near the mando, then take a more powerful throw on your next shot. That is especially true on narrow double mandos.
Conclusion
In this blog we’ve learned about mandos in disc golf, why we have them, and the different types. We also looked at the rules of play for mandos. There are many courses with no mandos, but others where they are necessary or desired. It’s good to know why they are there and how to play them.
One of the question I hear asked a lot when there is someone new to a disc golf group is, how long have you been playing disc golf?
I’ve often asked that question and have been asked it many times myself. It’s fun and interesting to learn how and when people started playing. It’s also interesting to see people’s skill level based on how long they have been playing, and what they are doing to improve at disc golf.
Some people have impressive amounts of skill, even though they haven’t been playing long. Others are at about the level we would expect them to be, based on how long they have been playing. There are a couple reasons why there might be a difference. First, some people just have more athletic ability than others. Second, the courses and people we play with can influence how much and how rapidly we grow. Third, some people want to get better while others are content to just play at their current skill level.
Survey From Remix Outdoors
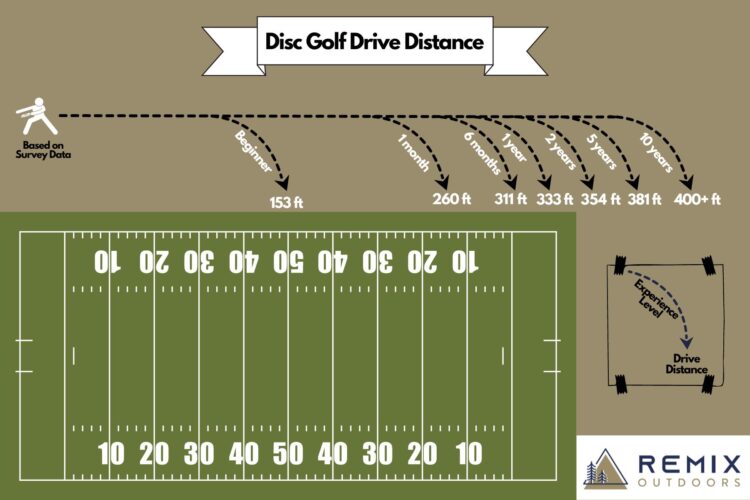
How does your growth and skill level compare to others? Our friends at Remix Outdoors shared the results of a survey they conducted among disc golfers which shows the average driving distance and the length of time playing for survey participants. This gives us an idea where our skills match up with others who have been playing as long as us. Every disc golf wants to get more driving distance.
According to the survey, after starting out as a beginner, the average disc golfer doubles their driving distance in just six months. Then the average distance gains slow quite a bit. The longer we play, the more difficult to add distance to our drives. I’ve seen this trend among a lot of disc golfers that I know. Although the arc seems accurate, the distances seemed a little lower than I’ve seen.
I would have guessed that the average disc golfer would have picked up a little more distance in the first year or so. After people learn the basics of form, quite a lot of growth can occur. Then the progress might slow down. Even so, the growth/plateau arc is close to what I’ve seen a lot. Is there something we can do to speed up the growth?
Improving at Disc Golf
There are several methods we can use to improve our skills in disc golf. Some cost money but most are free. They all involve investing time to improve our skills.
Watch Youtube Videos
One of the great benefits of social media is that people with a lot of knowledge can impart that knowledge to the masses easily and cheaply. There are many disc golf coaches who post videos that walk you through every aspect of disc golf. Watching the videos, doing the drills, and following suggestions can help us improve our skills. We can see every detail of good form, then work to implement that form for ourselves.
That method of improving does have a few drawbacks though. First, not everyone learns just by watching a video. Some need to be told how to make our body do the moves in the videos. We might assume we are doing what is suggested in the video, but really just creating new bad habits. Which leads us to the second drawback: A video can’t give feedback. Unless we know we are using proper form, we can’t really correct our issues. Which leads us to the second method we can use to improve:
Take Video of Our Form
If you watch good tutorials you can get a good mental image of what proper form looks like. If we then record and watch ourselves doing the same moves, we can compare our form to the proper form to see what areas we need to work on. This still requires us to be able to make changes to the way our body moves, which may or may not be easy for us. That is where the last improvement method comes into play:
Get Some Coaching
Having a knowledgeable coach watch our form and give immediate feedback, including ways we can correct any issues we’re having, is a great way to speed up the learning curve. This takes more than just pointing out problem areas. This means finding someone that can teach us how to change our muscle memory and lay the foundation for good form and good habits.
When it comes to coaching, there are several options. Some coaches have monthly subscriptions that include video form reviews. Others offer single lessons with feedback. If you are lucky enough to have a good teacher in your club, you can get some one-on-one coaching or maybe some feedback if you’re playing a casual together.
Practice!
Regardless of the method you choose to improve your skills, if you don’t plan time for practice, you are making the road to getting better a hard one. I mean, even the pros practice. We need that body/brain connection on a regular basis to cement the neural pathways so we can duplicate the correct form on a regular basis. Practice!
What is YOUR experience with driving distance vs Experience?
As I said in the before, the general trajectory I’ve frequently seen with new players fits nicely with the results of the survey by Remix Outdoors. How we fall on the scale and how fast we want to advance is up to us.
How about you? How fast did you gain distance? Are you taking steps to improve your disc golf game?
This post on disc golf shot selection and ground play, is the next post in a series designed to help you elevate your game. Watch the videos and reinforce the concepts through reading. Watch, read, practice, and improve!
If you have ever played even one round of disc golf, you’ll know that each time you step up to your shot, there are any number of lines you can take.
And the more you play, the more you begin to strategize about how to approach each shot.
In addition to this, as you gain experience, the more types of shots you add to your arsenal.
In this post, we’ll look into ideas on shot selection and we’ll also consider how to utilize ground play.
Combined, these two ideas can set you up for success on the course and give you more quality looks at the basket.
Let’s watch how the pros analyze their options for any given shot and then see how they can utilize ground play to get that much closer.
Disc Selection When Taking the Hyzer Lines!
Sometimes we need to take a hyzer line and carry around obstacles.
Many times, your average every-day player will just grab the most stable disc they can, thinking it will hyzer the most.
But this might not actually be the move.
Infinite pro Eric Oakley shows us that the less stable discs with higher glide stay in the air longer and can carry the turn even more than their more stable counterparts.
Go test it out with your discs and reassess which disc you’ll reach for when you need to cut around a steep corner on hyzer.
As we know, those extra feet can equate to closer putts which can mean lower scores.
Now watch and see Oakley explain and demonstrate below!
Now from disc selection we look at shot selection to make sure we’re putting ourselves in the best position possible.
Shot Selection With Dave Feldberg
When assessing a given shot, David Feldberg suggests you ask yourself one question.
“What is the highest percentage [shot] for me?”
Go through your progression of shots that are most comfortable for you. If there is a clear shot that you feel confident with, take that one. If your favorite/best shot isn’t available, cycle down to your next favorite/best shot. Keep doing this until a good shot presents itself. And hopefully you don’t find yourself throwing 360 power forehands through tight gaps in the woods too often.
The next thing Dave tells us to do is to look at the trouble.
“The number one thing I think about with shot selection is the miss.”
If you miss on a hyzer route, he explains, it could spell big trouble because the trees aren’t even halfway to the basket. The forehand route, on the other hand, might have the first trees come up 70% of the way to the basket.
So, even if you miss and hit a tree on that forehand shot, you are still much, much closer to the basket and have a far better chance of scoring lower.
“Consider where your common miss will go. And if the common miss for the shot you’re selecting, puts you in trouble or out of bounds, that’s not the shot,” Feldberg tells us.
So, sometimes your best option is going with a shot you feel less comfortable with because the margin for error is far greater.
Now watch as Feldberg takes you through it from his point of view.
Now, that we’ve seen this let’s take a look at a quick/related video on disc golf shot selection for approach shots.
Shot Selection for Approach Shots!
This is a quick tip from Kesler Martin that is definitely worth considering.
Basically his tip is this: Sometimes it’s better to take the safer line and plan to land 25 feet away instead of going for the park job.
A lot of players just look at the basket and try to figure out how to get it as close to the basket as possible on any given shot (understandably so btw).
But that shot may be blocked with all sorts of obstacles.
And if you had Circle 1 be your target their might be a much safer line that will get you close and still give you a look.
Give it a look and consider for yourself! It might just steer you clear of danger the next time you’re out on the course!
If you are interested in more information on approach shots, we have a whole post dedicated to it that can be found here.
Now, let’s see how ground play, in conjunction with shot selection, can get us closer to the basket on a given shot.
Adding Ground Play to Our Game!
Sometimes the better shot is to avoid the ground and just let your disc simply land by the basket.
If there are roots, rocks or other protrusions, these can be unknown variables that could negatively impact the path of your disc towards the target.
But other times, a shot does call for the ground play.
And if it does, it’s helpful to know how that disc will react when it hits the ground.
Basically, Feldberg breaks it down like this:
Overstable discs will skip hardest to the left (for RHBH)
Stable to neutral discs are more likely to skip straight.
Understable discs can even skip right.
This is very useful information to have, and well worth trying with the discs that you bag. By understanding ground play, Feldberg explains, you can better set yourself up in position for a more makeable putt.
Now watch him demonstrate and take you through his thinking. Notice how different discs, on similar angles, have far different reactions on the ground.
Disc Golf Shot Selection & Ground Play – In Summary!
As we’ve seen, disc golf shot selection and understanding of ground play can help shave strokes off your score.
Now, when you step up to any given shot, you can go through your progressions and pick the best shot for you in any given situation.
Over a round, by giving yourself higher percentage shots with shot selection, and getting closer to the basket with ground play, you can see strokes melt away.
And by choosing the right disc for a given shot, your odds get even better.
Let us know in the comments if you have any related tips that you swear by as well.
Over time by adding these ideas as well as other disc golf tips, we’ll evolve into the disc golfer we’ve always envisioned ourselves to be!
This post on disc golf tips for beginners, is the next post in a series designed to help you elevate your game. Watch the videos and reinforce the concepts through reading. Watch, read, practice, and improve!
Disc golf is an amazing game.
It’s fun, somewhat inexpensive, and a great excuse to get outside with friends or on your own.
Perhaps best of all, the people are amazing.
Seriously, good luck finding a nicer bunch of people than disc golfers!
And part of being nice, is being helpful.
By extension, part of being helpful is to give advice.
Do you see where I’m going with this?
Because disc golfers are so nice, they are more than happy to dole out what they know.
If you are reading this, there is a great chance you classify yourself under the broad umbrella of “beginner” (welcome!).
Having been there myself, I know for a fact that there is no shortage of information on throwing form, flight numbers, putting, disc golf in the elements, etc.
It can be mind-numbing and somewhat daunting.
The last thing you want in a game with so much information is to feel daunted.
There is a natural progression for learning anything, disc golf included.
And for the most part, you can’t skip steps along the way.
So, with that in mind, we have created this post. It will give you some important advice for beginners without flooding you with too much information.
Then, at the end, if you find yourself wanting more, we’ll help direct you where to go next.
So, take a deep breath, and settle in for the long, winding, breathtakingly glorious ride that is disc golf!
Don’t worry about the destination right now, just enjoy the journey.
Ready?
Let’s begin…
General Advice for Beginners
Disc golf pro and legend David Feldberg, has played a lot of disc golf and accumulated a lot of wisdom along the way.
Part of this wisdom is to lay out sound advice for beginners to help them want to continue to progress with the sport.
With that in mind, here are his tips to help keep you in disc golf for the long haul. Read what he has to say and then check out the video as well!
Tip #1 – Play Easy Courses!
Nobody likes to feel “bad” at something.
As adults, we tend to gravitate towards activities we feel we are good at, and avoid that which we don’t feel successful at.
People that enjoy and practice art, were probably good at it growing up. Then, because of the positive feedback they got, they most likely stayed with it and got better.
There are always exceptions, but for the most part, that’s how things usually work.
Bringing it back to disc golf, you absolutely want to feel successful.
So, do yourself a favor and play easy, short courses to start.
Don’t pick a course with tight fairways, water carries (note: 99% of discs sink), and holes that are infinitely long.
That’s just frustrating! And when you lose discs and feel unsuccessful, you’re probably less likely to pursue that hobby.
Set yourself up for success by choosing shorter, open, and easier courses to start!
Feldberg had this to say. “Find an easy course, enjoy playing, and guess what, you’ll play for a long time.”
Sounds good to me!
Tip #2 – Buy/Borrow Used Discs!
Wait. An online disc retailer is telling me to buy used discs?
Yup! We just want you to succeed!
Basically though, discs that are broken in and used, tend to fly better for beginners.
Also, used discs are cheaper so if you lose any (it happens), you don’t feel as bad.
Then, once you start to understand flight numbers, what each disc does, and what you are looking for to suit your game, c’mon back! We have got you covered in the disc department!
A common mistake beginners make, Feldberg explains, is to imitate what they see others doing and try to replicate it for themselves.
He reminds us that each person is built differently (height, arm length, biomechanics, etc.) so what is good for one person might not be good for you.
Also, unless the person you are imitating is a pro, there is a good chance the person you want to emulate is doing a few things wrong themselves!
So, for the most part, try to avoid imitating others… This leads nicely into his final tip…
Tip #4 – Learn to Throw “Mechanically”
“If you build bad habits to start, they take very long to break,” Feldberg explains.
Therefore, he tells us, it behooves us to learn correctly right away.
This means using the proper form mechanics which you can learn from him and other trusted pros/coaches on YouTube (Be sure to subscribe to Infinite’s YouTube Channel!).
Feldberg notes that it is harder to score well in the beginning when you are practicing correct techniques (that’s why we start on easy courses!).
But, as you progress in the sport, your good habits will accumulate and you will greatly surpass the ceiling you set on yourself by starting with bad habits.
Follow proper mechanics, as best you can, from the outset, and reap the rewards later!
Now, watch and see Feldberg explain all of these tips for himself!
Improve Accuracy and Distance!
Now that we’ve touched on some of the very basic concepts to keep you invested in disc golf for the long haul, we thought we would show you a few beginner-friendly tips on how to improve your distance and accuracy when you throw.
And that will be it (remember, we said we wouldn’t flood you)!
But then, if you find yourself pining for even more, at the end of this post we’ll be sure to direct you to some of our other posts with helpful advice from pros…
In the next video, however, Connor teaches us how to improve our accuracy and distance with a few simple tips.
Connor tells us that when he takes his friends out that have never played disc golf before, there is a common mistake they almost ALWAYS do when throwing a backhand.
That mistake is that they never take their eyes off the target.
This limits accuracy and distance. We don’t want that!
Let’s watch and review the major points afterwards…
Connor’s Disc Golf Beginner Tips on Accuracy!
We already saw that he’s telling us NOT to look at the target when throwing backhand.
How then, you ask, do I take my eyes off the target AND become more accurate?
Great question!
Basically, Connor shows us this in two simple steps.
Accuracy Step #1 – Plan Out Your “Run Up”
Note: If you are a beginner you probably do NOT want to be running up at all! This just speeds everything up and leaves far more room for your swing to get out of sync!
Timing is key. Do a walk-up instead!
Then, by slowly pacing through your walk up, and planning your shot ahead of time, you can help yourself ensure that you are lined up correctly.
Accuracy Step #2 – Lead With Your Elbow
It takes practice, but think about leading with your elbow, down the line that you want to hit.
This will allow you to turn your head away while you shoot, AND still keep your line!
“When I am thinking about my form to hit a gap,” Connor tells us, “what I am doing, is aiming with my elbow. So I’m driving this elbow straight towards whatever target I’m [aiming] at.“
He adds that this will allow the disc to follow on a straight line towards the target.
Be sure to practice it, so you feel confident hitting your gaps.
Adding Power and Distance!
Luckily, Connor’s tip on not staring down the target for a backhand, also helps with power and distance!
At about the 4:30 mark, Connor shows us why keeping your eye on the target limits your distance so dramatically.
If you keep your eyes locked on the target, he shows, you severely limit your reach back and thus sacrifice a good deal of distance (as well as accuracy).
When you turn your head (some people think about keeping your chin over your lead shoulder) it allows you to:
Get a much farther reach back.
Engage your hips (most power actually comes from the legs).
Complete a proper weight shift (looking at the target usually means your weight is already on your front foot)
If you are watching this saying “Wait, Connor and others are looking at the target!” I understand where you’re coming from! It can certainly look that way…
But really, many pros are looking, looking, looking, then look away for the reach back, make their shot, release, and then look up again as part of the follow through.
Like many things, it’s a question of timing and it can be very hard to see in real time.
You’ll just have to trust him and know that he has your best interest in mind…
Want More?
I think we held up our end of the bargain by not flooding you with too much information at once.
If you’d like, it’s perfectly okay (perhaps recommended) that you stop here and go practice what you’ve learned so far.
However, having been there ourselves, we know that some of you are hungry for more.
With that in mind, we have some more posts that focus on specific disc golf skill sets for you to check out.
Notably absent is a post on “Distance and Power.”
For starters, we already gave you a tip on that in this post.
But also, this is a common trap for beginners to fall into. Don’t fall into it!
As you learn mechanically (Feldberg’s Tip #4) your distance will naturally and gradually improve.
Then, once you are an intermediate player, come back for more and we’ve got you covered!
Here are some other topics for you to explore more in depth if you are interested:
What advice did you wish you had earlier in your disc golf career?
What else do you want to know about?
Let us know all this and more in the comments below!
Disc Golf Tips For Beginners – In Summary!
As we said at the beginning, disc golf is an amazing game.
And truly, we want you to find the joy that we find for a long time to come.
Part of this is taking it in stride and not biting off more than you can chew.
Another part is to set yourself up for success.
Be sure to play easy courses and find enjoyment. Go ahead and borrow discs, but don’t borrow too much advice just yet. Get your advice from the pros instead!
By learning to play correctly from the jump, you’ll help set yourself up for success on that long and glorious journey that we call disc golf.
This post on throwing a disc golf roller, is the next post in a series designed to help you elevate your game. Watch the videos and reinforce the concepts through reading. Watch, read, practice, and improve!
At first glance, the disc golf roller seems like a very complicated shot.
It looks useful, but also difficult.
And there are many reasons we could want to throw a roller in disc golf. There could be low-hanging branches that limit our ability to throw into the air.
Or, maybe we like our chances of getting through the trees with our disc moving vertically instead of horizontally?
Perhaps we need to have our disc cut a corner rather abruptly?
I’m sure most of us are familiar with seeing the pros throw these massive, distance rollers that roll for days. Maybe that’s what you want?
There are pros and cons for electing each shot, and the backhand roller is no different.
By understanding how and when to throw the disc golf roller, you can set yourself up for success when you are on the course.
And thankfully, as we hope you’ll see, it’s NOT as difficult as you may have thought!
As is the case with all shots, you’ll want to practice this shot so you can throw it confidently when it matters most.
Nevertheless, by the end of this post, we think you’ll have the information you need to gain that confidence.
Let’s get into how to throw a roller right off, by watching a clinic in which a young Ricky Wysocki answers a question where he explicitly addressed how to throw rollers!
Ricky Wysocki’s Advice on Rollers!
Of rollers, Wysocki starts by saying this: “It’s basically just an anhyzer that you throw into the ground on purpose.”
Let’s watch his explanation and we’ll go over the highlights afterwards, so you feel extra confident in your own disc golf rollers!
Here are the major points Wysocki covered in this video!
Pick Your Angle!
This will take practice to see which angle works best for which disc.
Before you throw, however, be sure to decide which angle you want to release the disc on, and keep the disc on that same angle from your reach back to your release.
Snap the Disc!
Just like a regular backhand throw, you are snapping the disc at the end (on the angle you brought it back on).
Create an Arc!
Because, this is “an anhyzer you throw into the ground,” the reach back and pull through follow a different path.
Basically, you are creating an arc where the disc starts slightly below shoulder height in your reach back and then follows an upward trajectory slightly over your head and releases down.
In the next video, you will see it described as “painting the rainbow” which provides a nice visual to think about as you’re throwing.
Select Angle Based on What You Want The Disc To Do
Ask yourself What you want your disc to do after it’s released. This will determine your angle.
Want a quick cut roller? Put the disc on a steep angle (nearly perpendicular to the ground).
Want a longer, straighter roller? You’ll want to throw your disc on more of an anhyzer and have it stand up and roll.
In general, he tells us a little later that the flippier the disc the more likely it is to cut faster.
The more stable the disc is that you use, the more likely it is to roll longer and straighter.
Practice!
Play around with different discs and different angles when you are practicing your backhand rollers.
In this way, you’ll see how a given disc behaves for a given throw.
Then, when it’s time to throw it when it matters, you can do so confidently!
Choose the Right Disc!
As we all know, different discs have different stabilities.
Flight ratings will give an indication, but weights, plastic types, arm speeds, wind speeds, and more will factor in as well.
In general, Ricky recommends using an understandable disc for rollers. He also recommends trying your rollers out with different discs to find what’s right for you. Check out this list for the discs most recommended for rollers by our reviewers.
Once you know your discs well, you can choose the right disc for different roller situations!
Where to Land the Roller!
For a typical roller, Ricky recommends that you land the disc 60 to 80 feet in front of you.
As is the case with everything on this post, you’ll want to play around with different distances for different discs so you can find what’s right for you.
He tells us that you want it to act like an air shot and throw it out. Then, you let the understable disc do the rest of the work and come down into the ground.
“Focus on throwing out instead of down.”
More Disc Golf Roller Tips!
The next video features disc golf legend David Feldberg.
With over $400,000 in career earnings, he certainly knows his way around a disc golf course.
The point is, he has a lot to teach, and I’m listening.
In the beginning of his video, he gives a slightly different twist on the disc golf roller than Ricky did above.
He gives a common misconception people have on throwing disc golf rollers.
By understanding this we can adjust our throws and throw our rollers correctly.
Let’s watch the video and go over the rest of the talking points afterwards!
A Common Misconception for Rollers!
Feldberg starts by highlighting a very common mistake he sees when some disc golfers try to throw rollers. He tells us not to do this:
Don’t throw a normal backhand and then twist your wrist down at the end!
This does cause the disc to roll.
But, Feldberg explains, it greatly caps the amount of distance and control you can get.
Related, it’s very difficult to be consistent with.
I don’t know about you, but I don’t want to sacrifice distance, control or consistency!
Paint The Rainbow!
Instead, he tells us to “paint the rainbow”.
This is an idea he got from fellow legend Steve Wisecup.
Basically, like Wysocky was talking about above, you are going to reach back at the roller angle you’ve selected and make an arc (the rainbow) at least as high as your head (“maybe above if it’s a sky roller”).
When you’re “painting the rainbow,” you are flying the disc out (not straight down into the ground).
If done correctly, it allows you to transfer more of the energy from your throw into the disc (and not lose so much into the ground).
The best rollers, he tell us, hit the ground at the “peak of the rainbow” and do not bounce. Rather, they just smoothly roll.
This is something you can look for when you are practicing for yourself.
Adjusting The Type of Roller You Throw!
There are a few ways you can adjust what type of roller you throw. The first way to do this is by adjusting the release point.
If you want a sky roller, you will release the disc at it’s highest point in the arc.
If you want more of a level roller, then you will release it later in the arc after it’s come back down more.
In both cases, he tells us, you want to continue your follow through and complete the arc of the rainbow after you release.
That follow through also applies to the different swing plane you might put on a low roller.
For a low roller, it does look more like your traditional backhand throw. However, if you look closely (3:00 mark) you’ll see he is still following the arc on a more of a horizontal plane.
Whatever roller you throw, “ you want to have the roller [follow the arc of the] rainbow the whole way… and then you’ll have very smooth rollers.
Distance For Rollers!
Now we’re talking!
In general, Feldberg tells us, if we are hitting the ground 25 feet in front of us, we’re losing a lot of distance potential.
He then gives a general rule of thumb.
The farther you can get the disc to fly in the air before rolling, the farther it will go.
At the very least, we don’t want to be slamming the disc down so close to where we threw it from.
That will seriously damper our distance!
Understanding How Rollers Turn!
At 4:45 Feldberg instructs us how to know what the disc will do once it hits the ground.
This is based on the disc’s stability. It’s just like air shots he tells us (for RHBH. Opposite for lefties).
If it’s overstable, the disc wants to burn out to the left.
When it’s more of a neutral, straight-flying disc, the disc wants to go mostly straight on the ground.
If it’s understable, the disc wants to go right.
It’s Not As Hard As You Think!
Lastly, Feldberg finishes with some words of encouragement on rollers.
He tells us they are easier to learn than you may think and can take strokes off our score.
It’s definitely worth it to go out and practice.
Disc Golf Roller – In Summary!
The disc golf roller, can be a stroke-saving shot out on the course.
And luckily, it’s not nearly as difficult as it looks!
It’ll take practice. But once you understand the key components, and what a given disc will do at a given angle of release, you will have far more confidence throwing the roller when it really counts.
Then, when the course calls for a roller, you won’t even hesitate.
You’ll select your disc from you bag and step into that shot with the conviction that you can execute it!
And with another shot added to your bag of tricks, it’s more strokes subtracted from your score.
And then, like your disc, you’ll be really rolling!
Comment Below!
Thanks for reading everyone! If you have more questions please feel free to ask in the comments.
We’d also like to hear if any of the tips that were provided resonated with you.
Finally, if you have a roller tip that helps you, feel free to let the group know that too!
We sincerely hope this helps you throw those disc golf rollers out on the course! For other posts on disc golf tips and advice check out the link found here!


 For those disc golfer new to the sport, let’s define a few terms that we will use in this blog. These are terms you will commonly hear in disc golf. If you’ve been playing a while, you can skip over this section, since you will be familiar with these terms.


 Distance For Rollers!